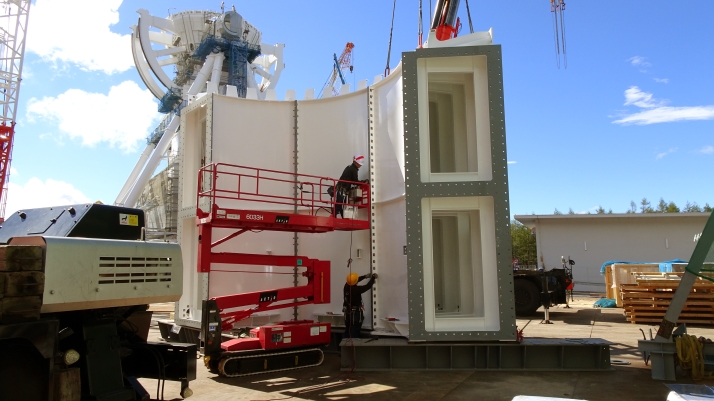
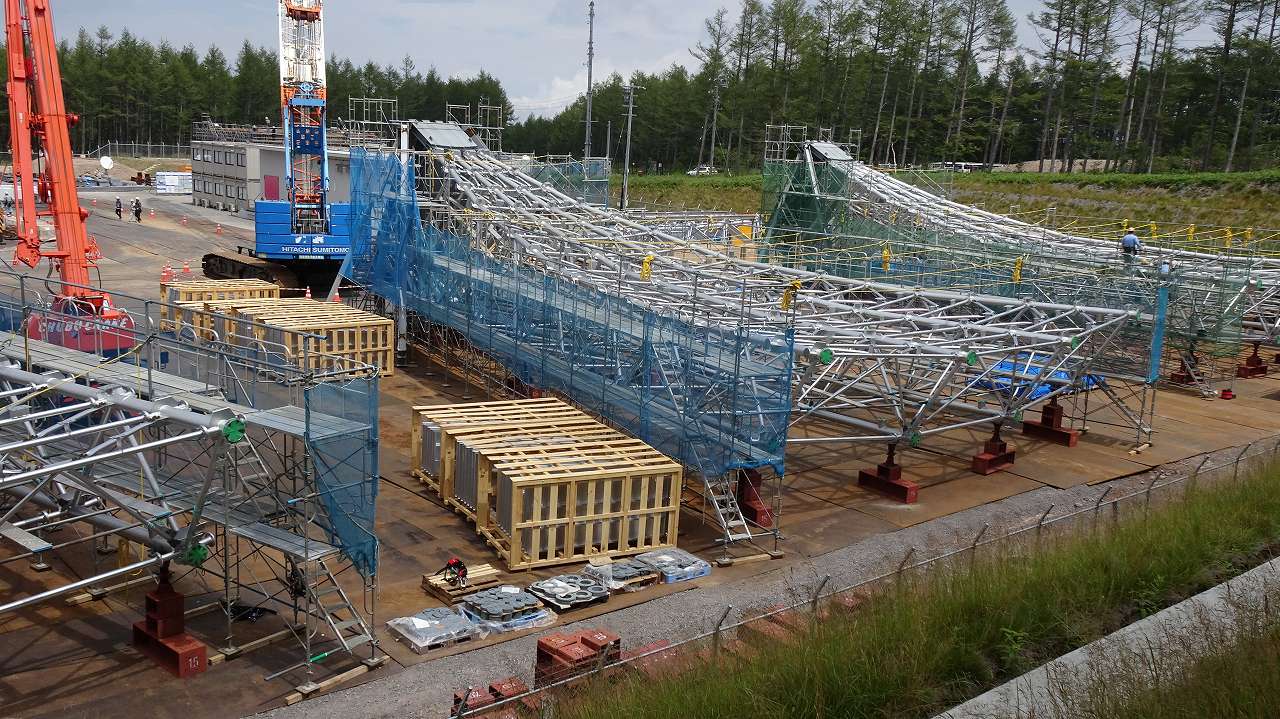
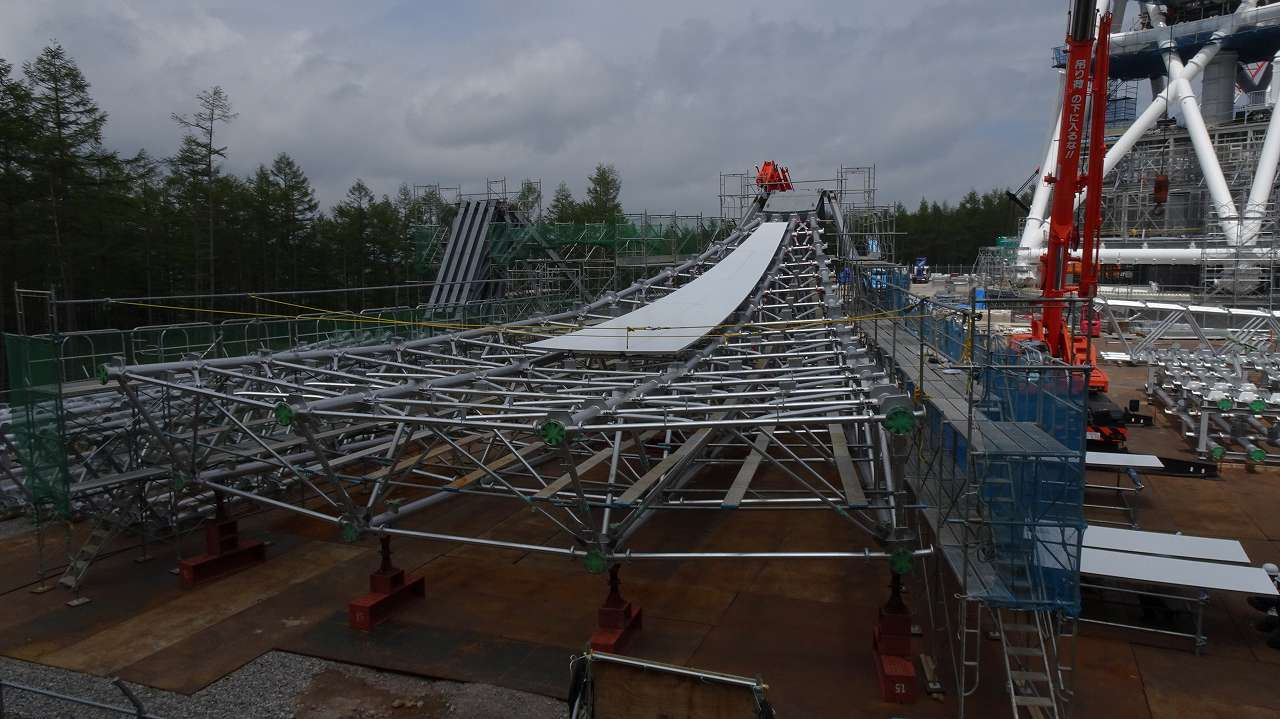
Antenna Assembly Construction (Reflector)
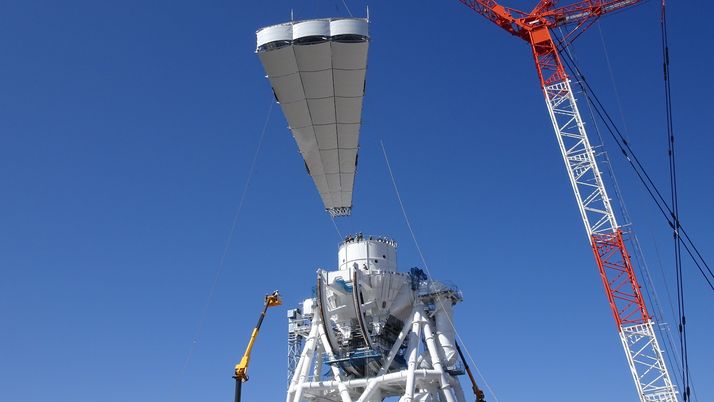
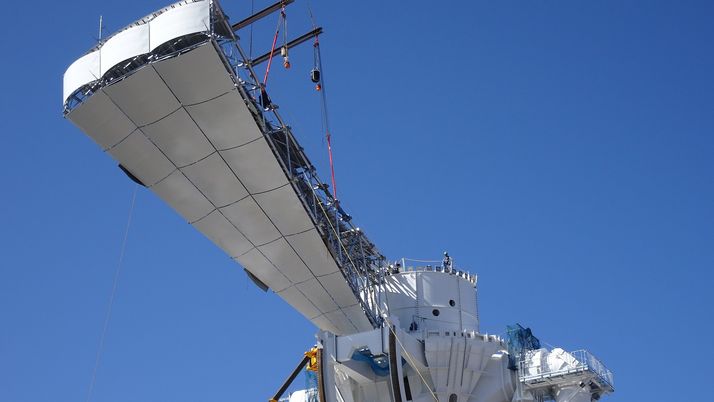
Antenna Assembly Construction (Main Reflector / Stay) #14
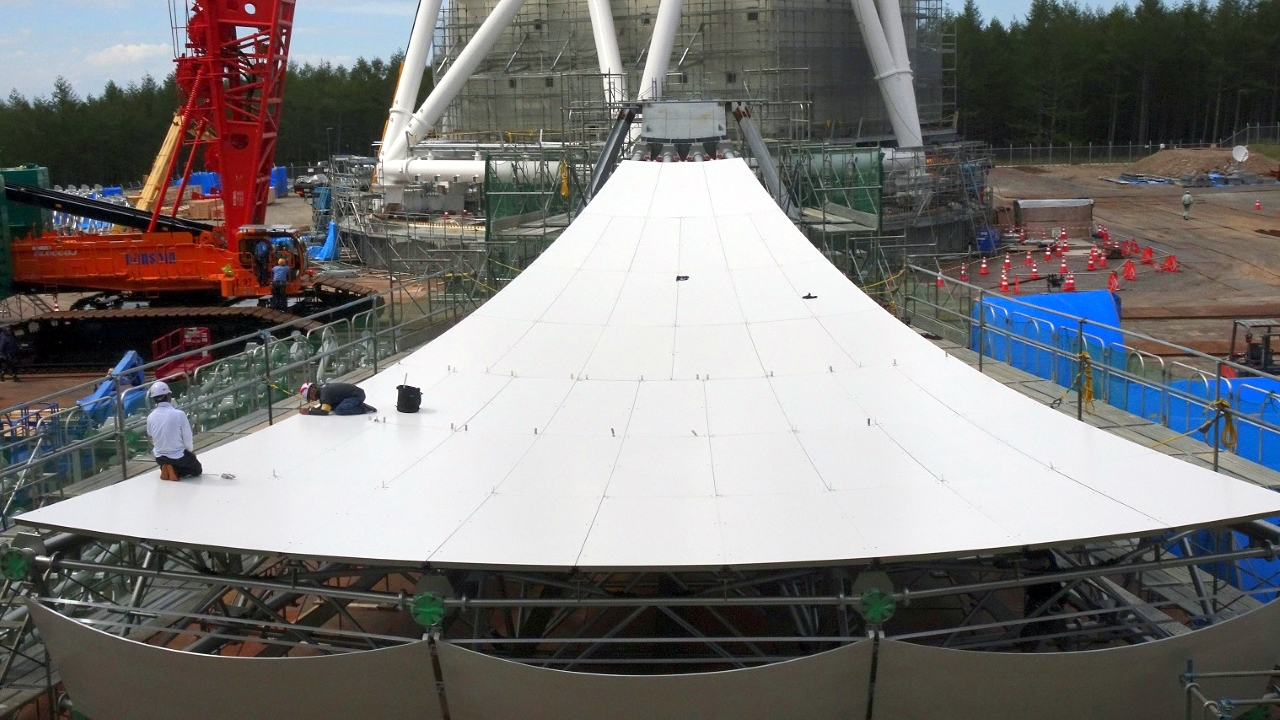
The remaining work is continued.
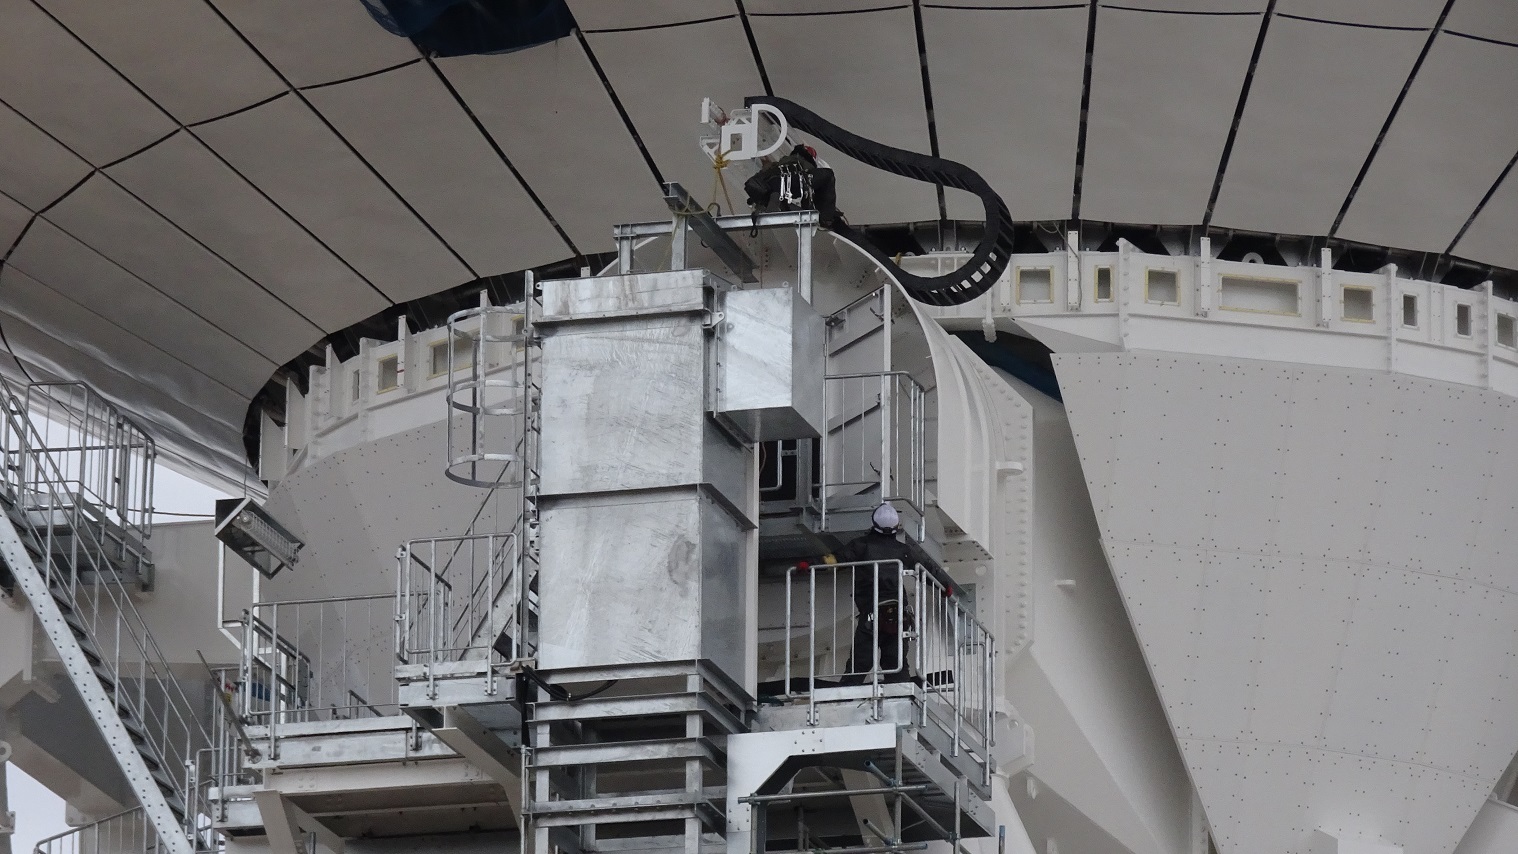
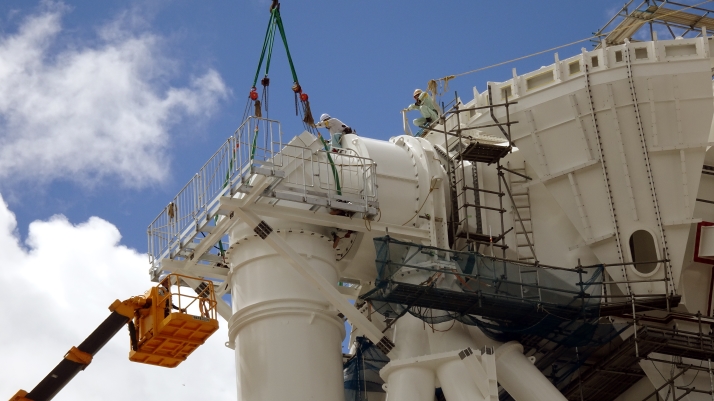
The take-up cable mechanism is attached to the EL rotatable structure.
An antenna for GPS reception was built on the south side of the 54m antenna.

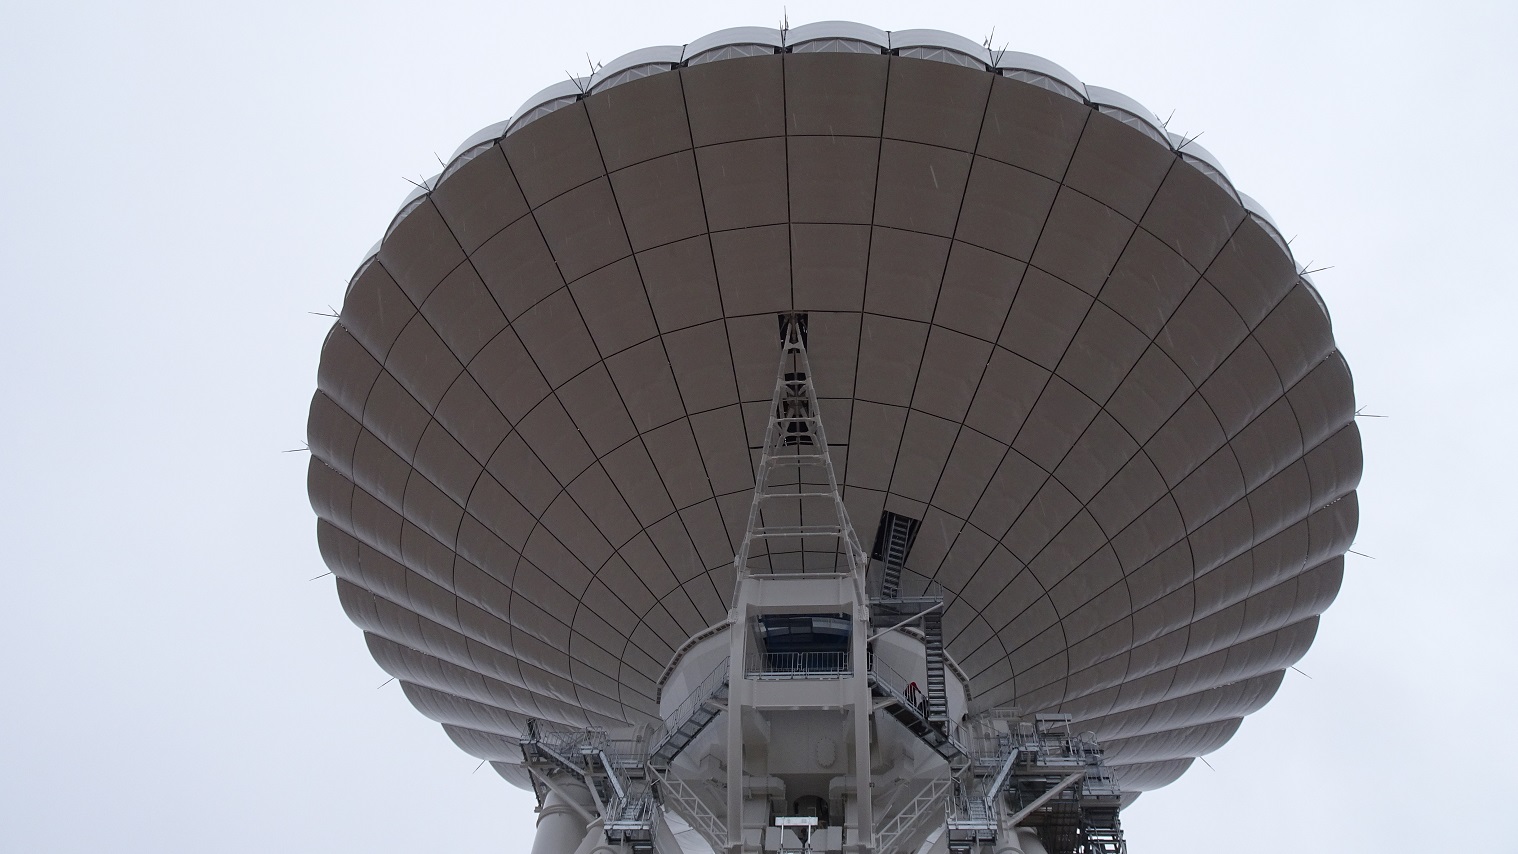
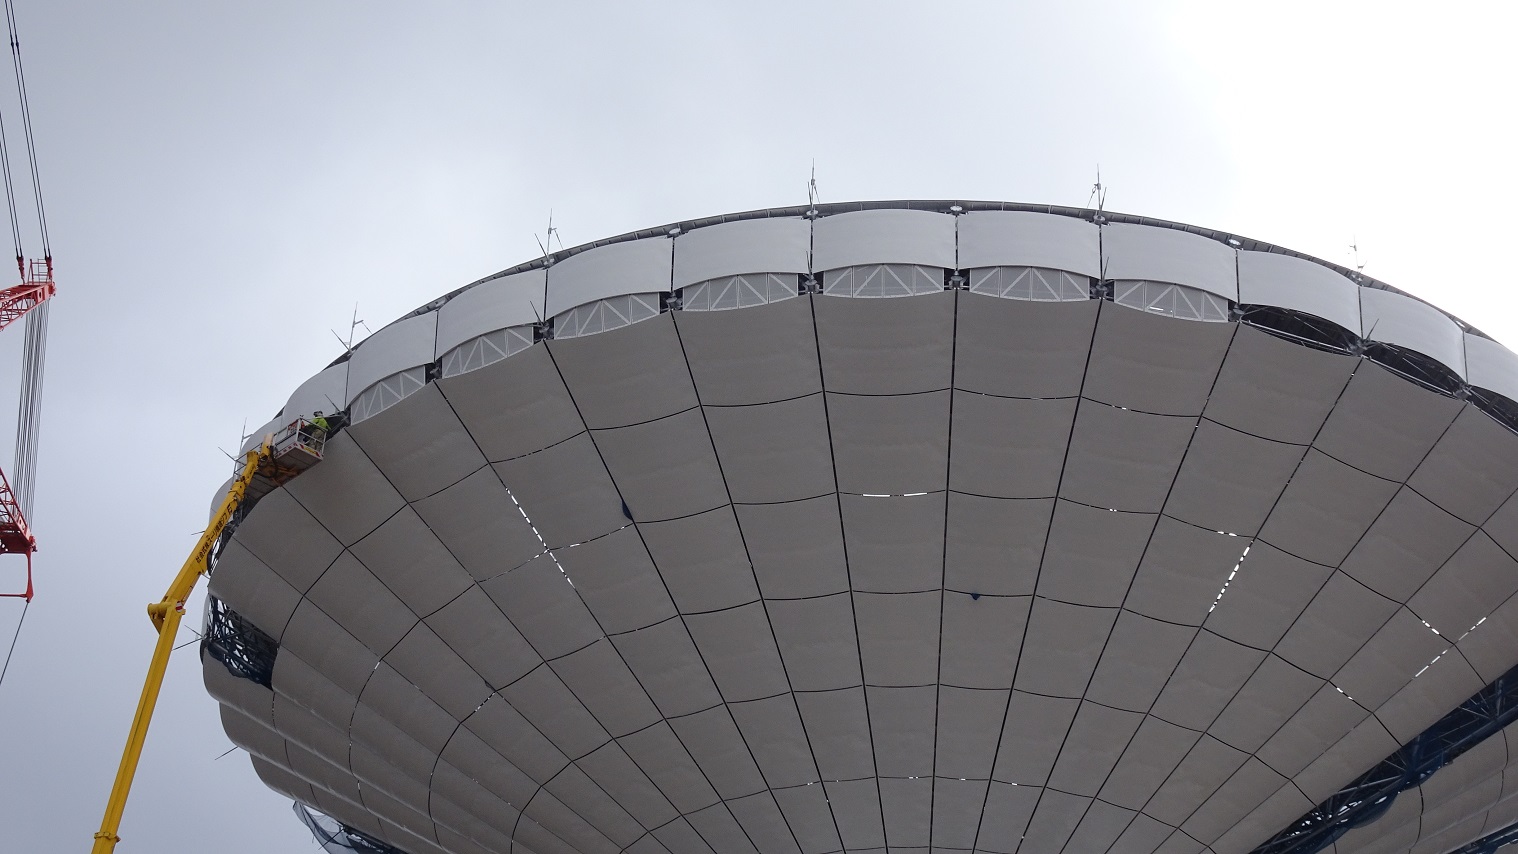
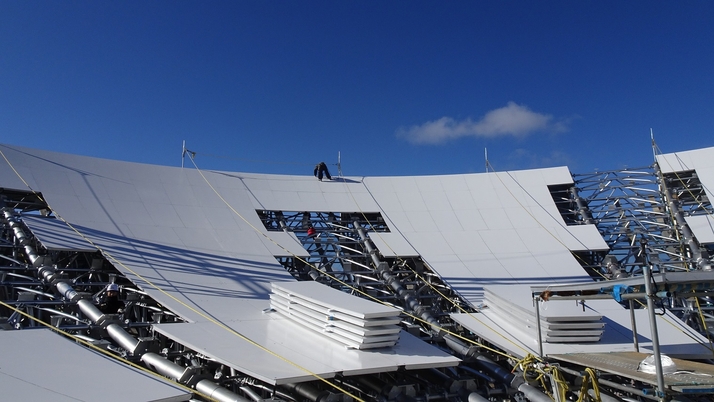
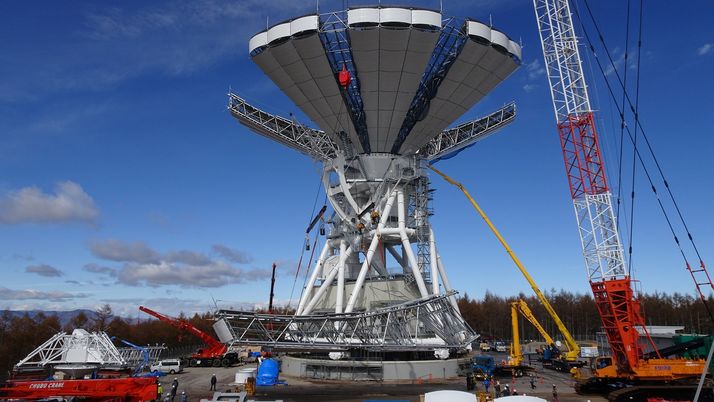
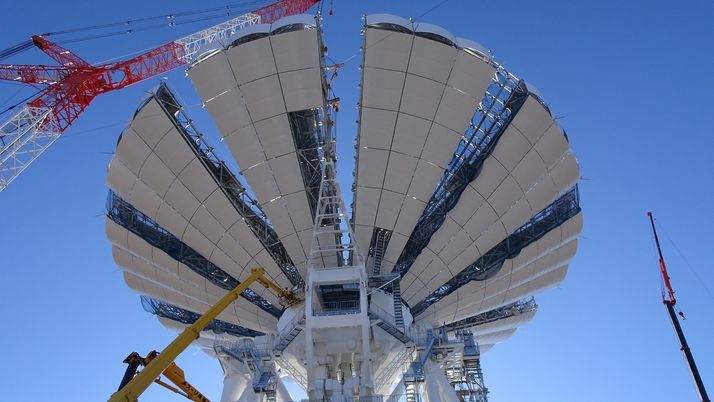
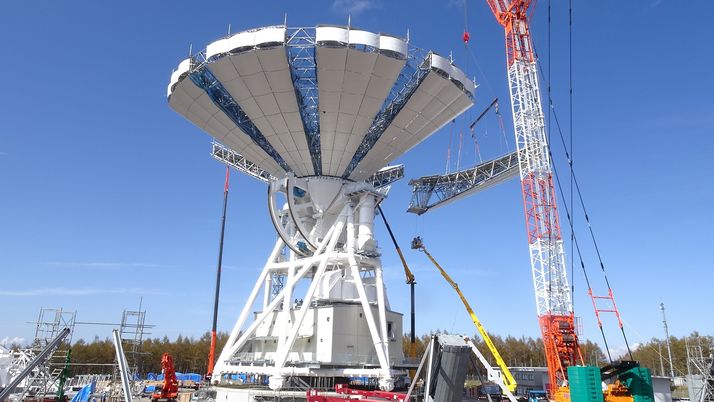
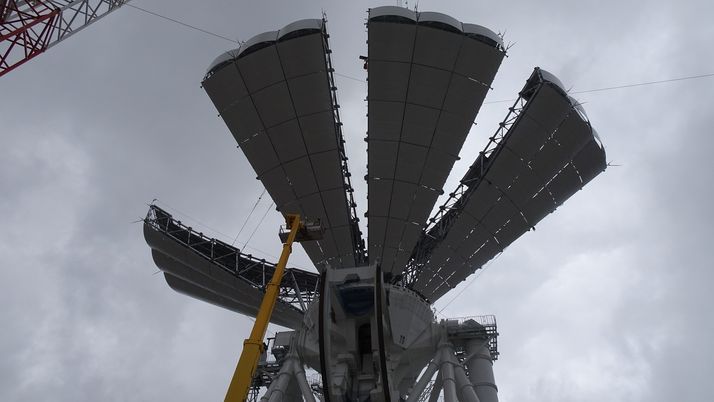
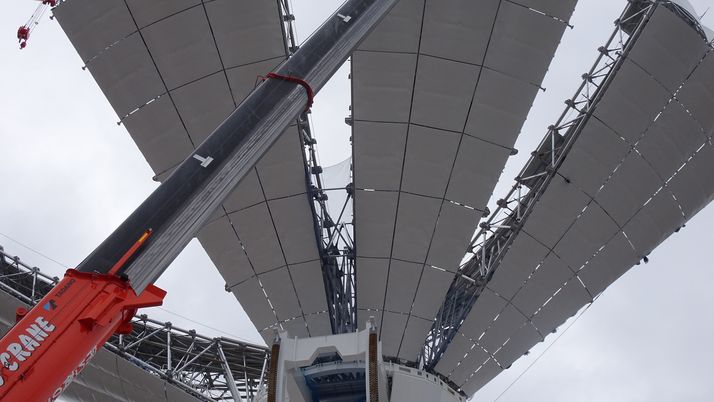
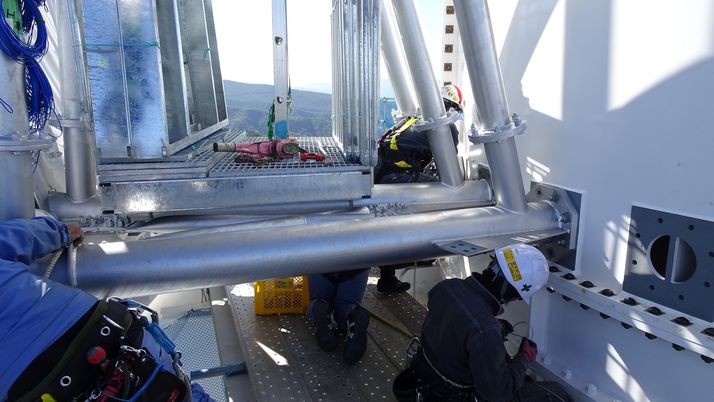
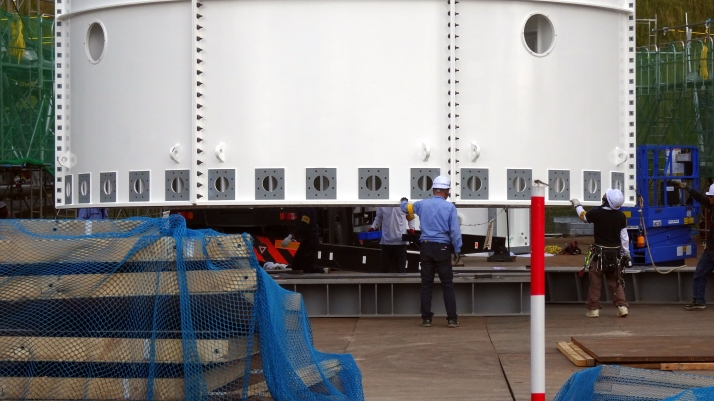
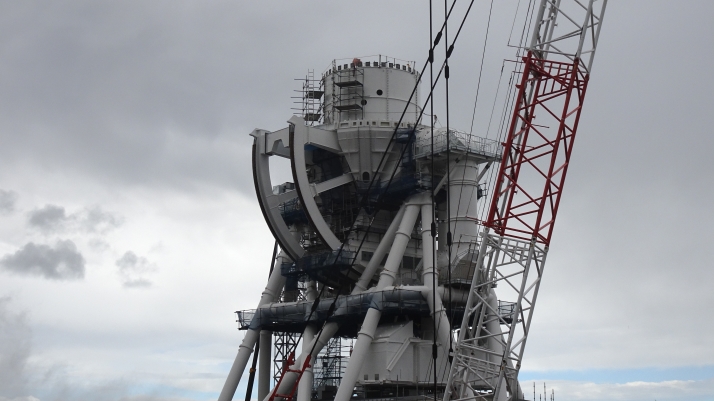
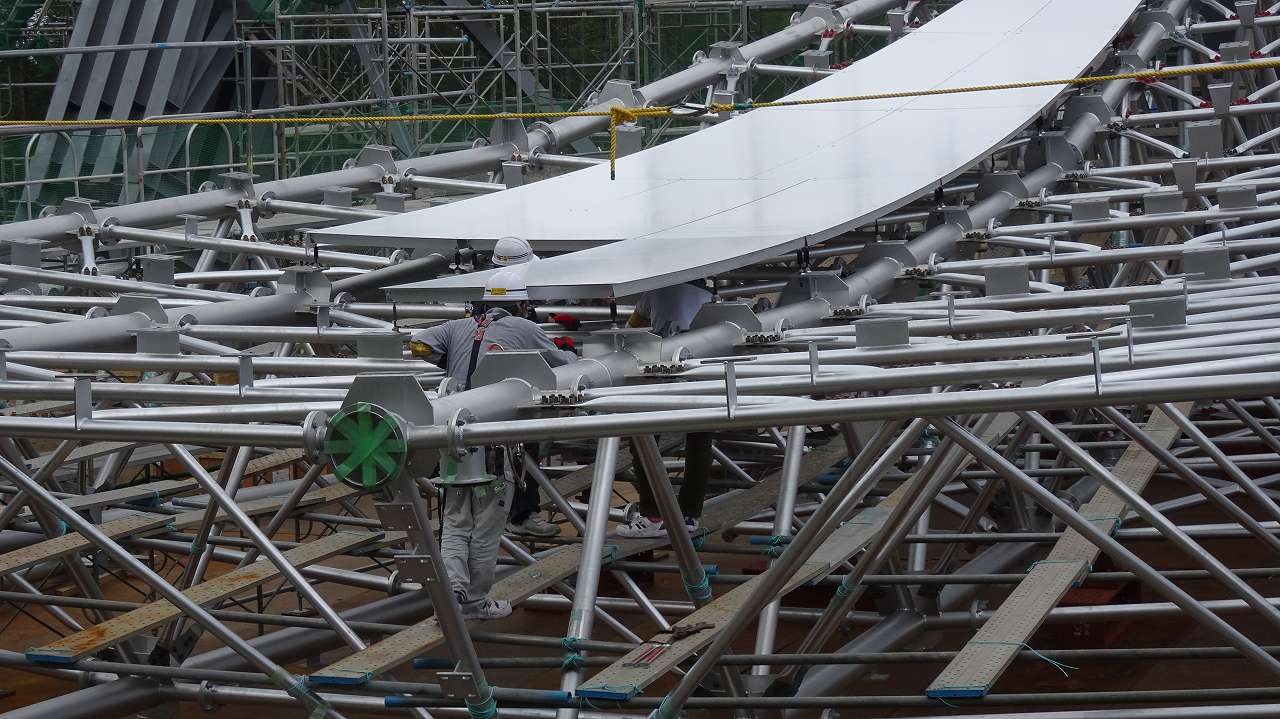
The attachment of the primary mirror panel and the sunshade panel is complete. Only one sunshade panel is left unattached.
The awning panel around the support truss has also been pasted. The access stairs to the inside of the main reflector have also been installed.
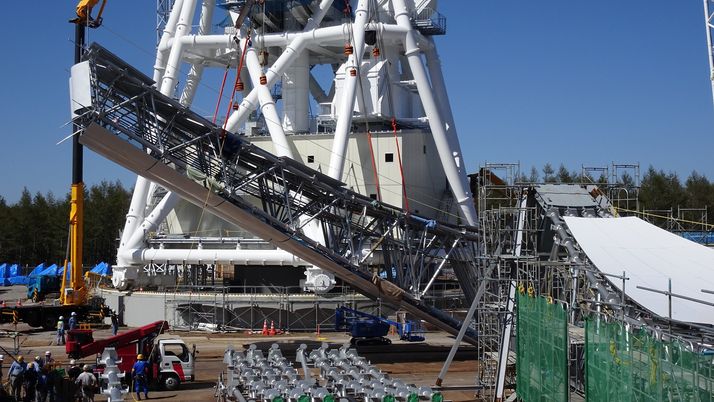
Antenna Assembly Construction (Main Reflector / Stay) #13
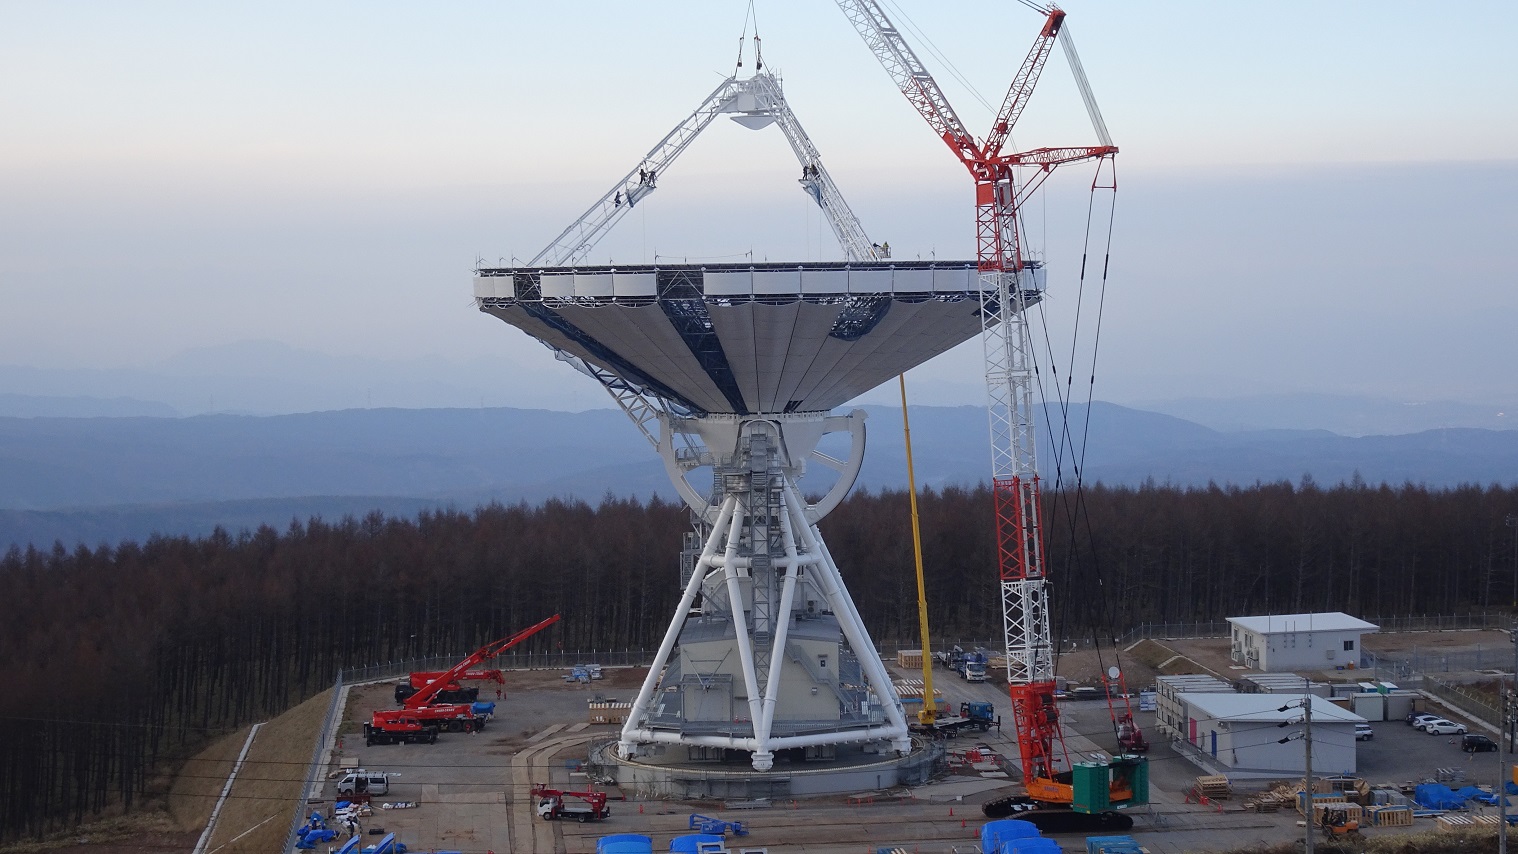
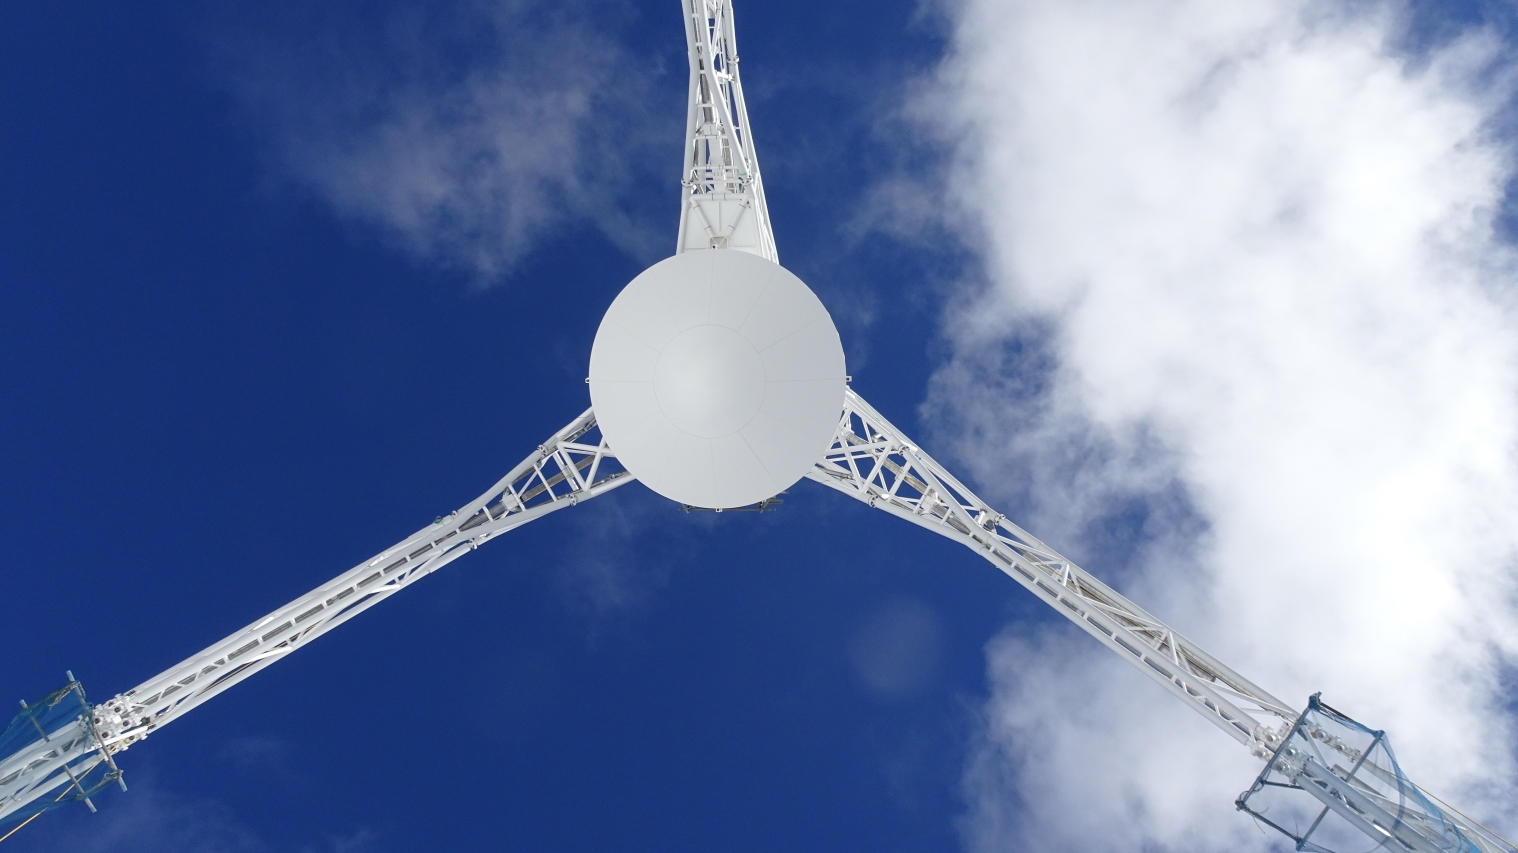
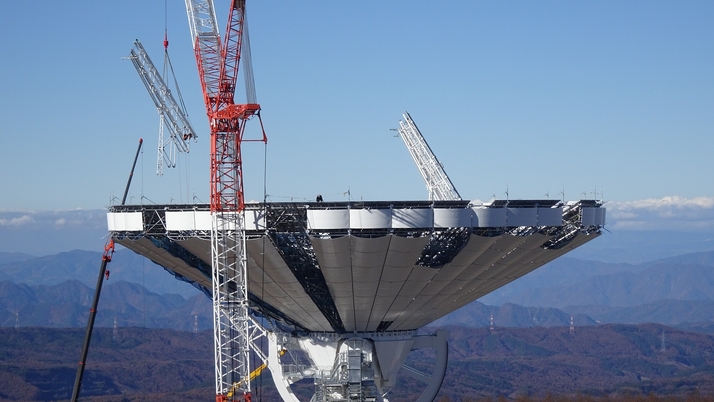
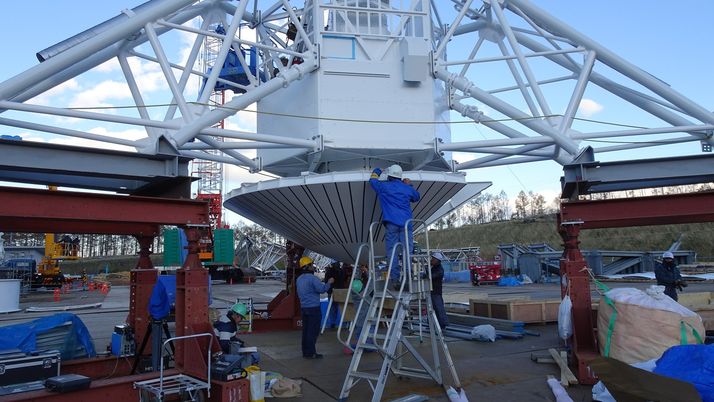
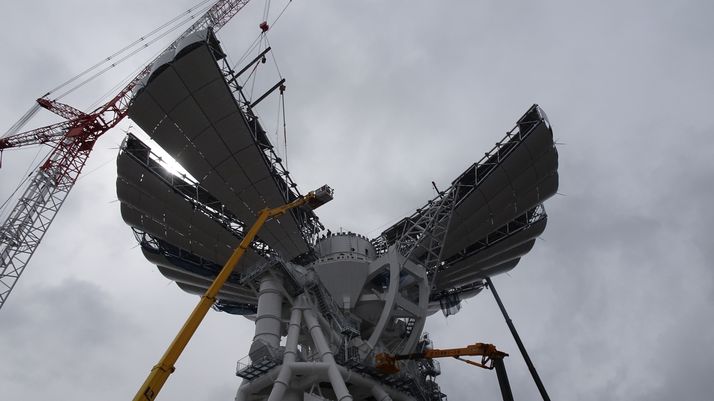
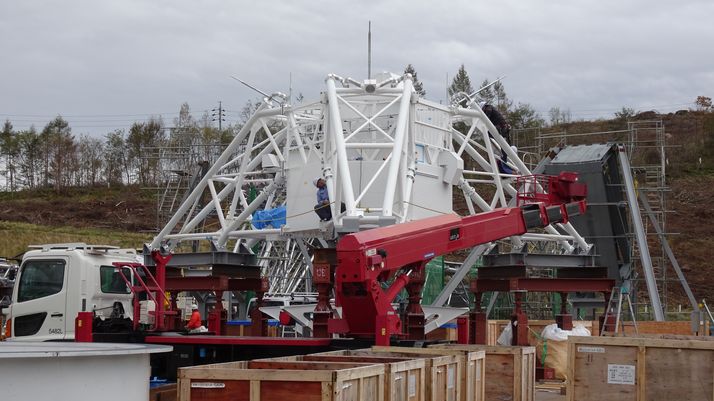
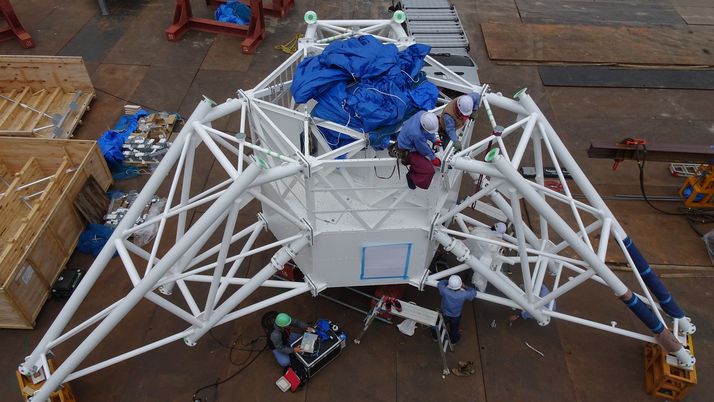
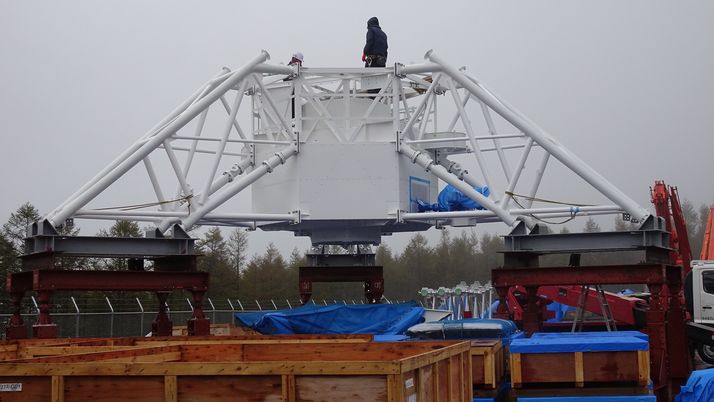
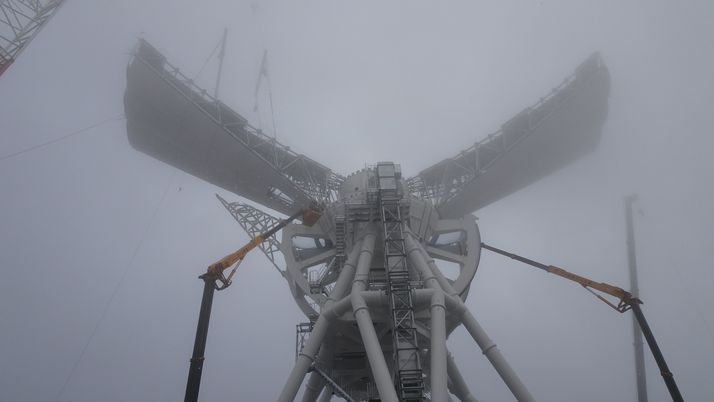
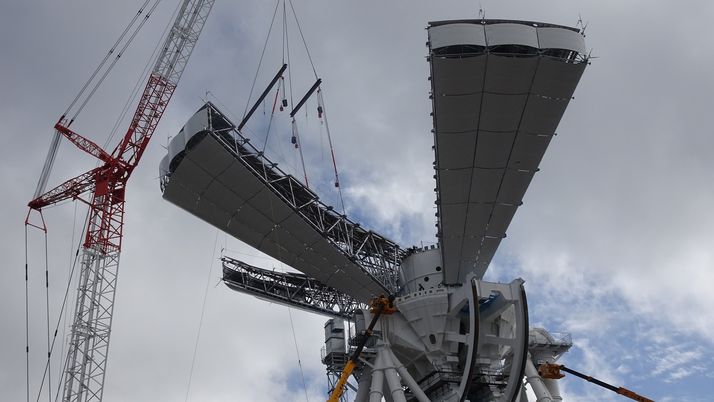
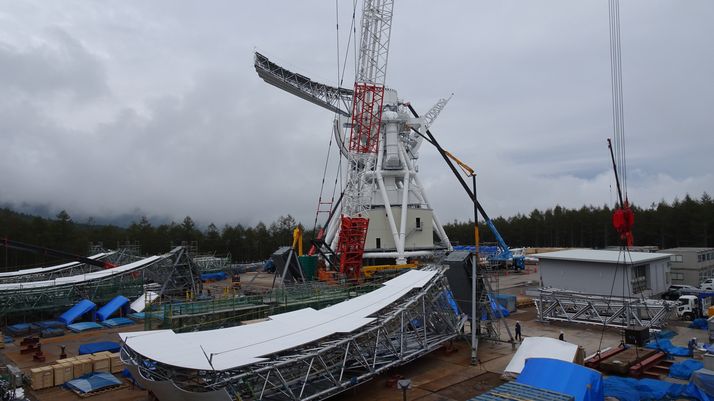
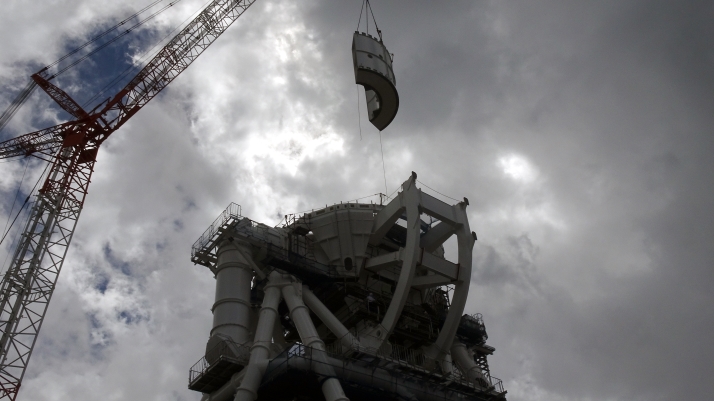
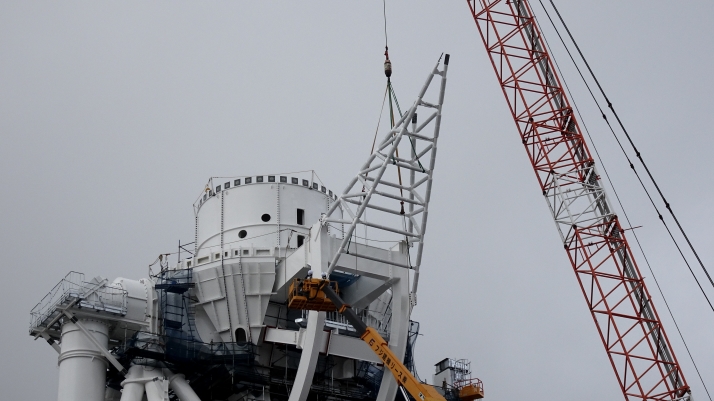
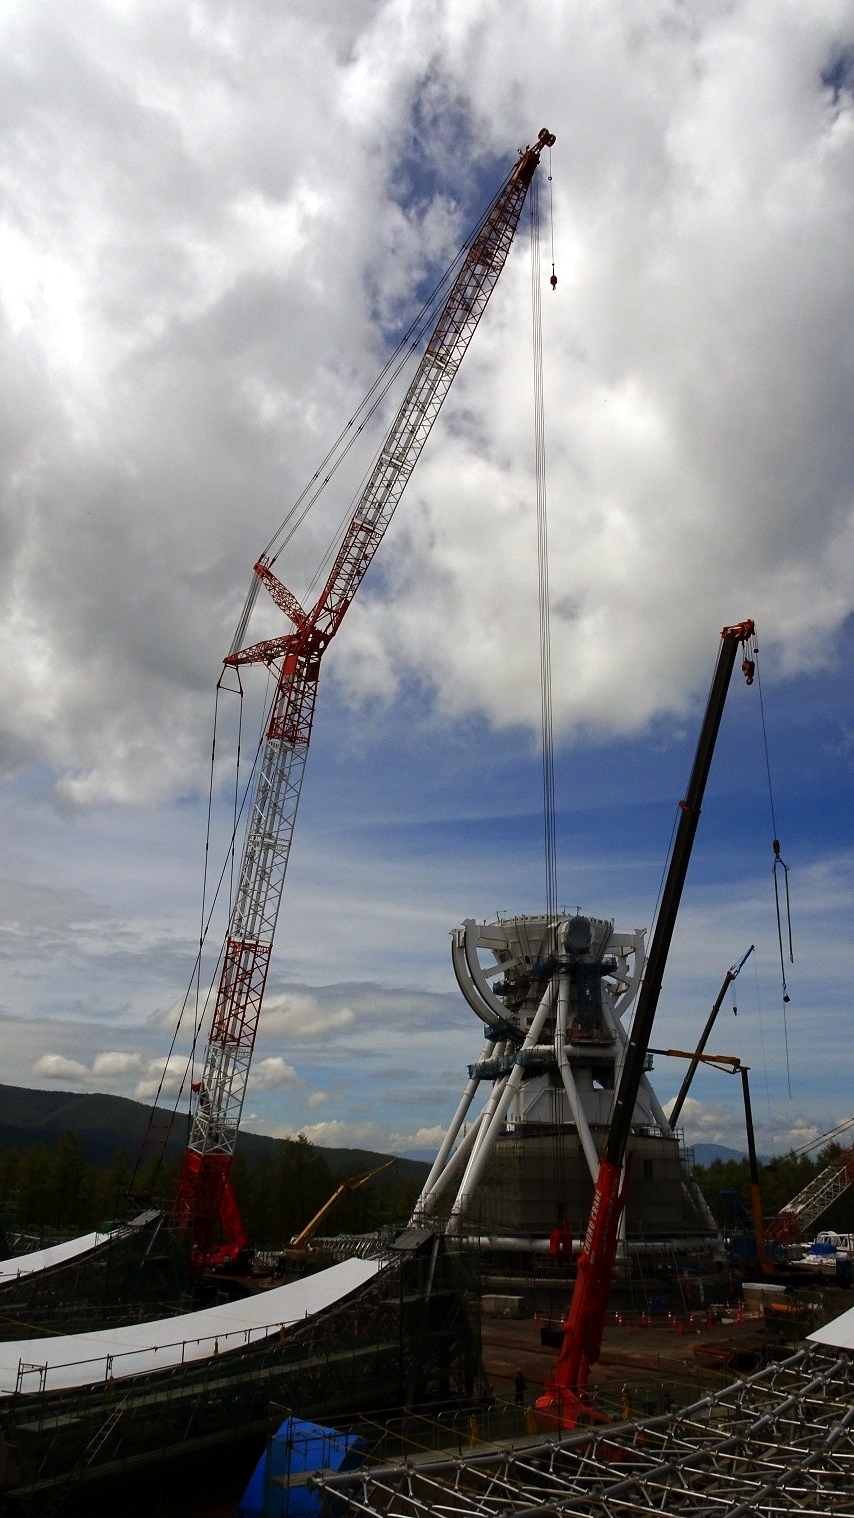
The sub reflector was installed on November 18.
Stays are attached to the sub reflector.
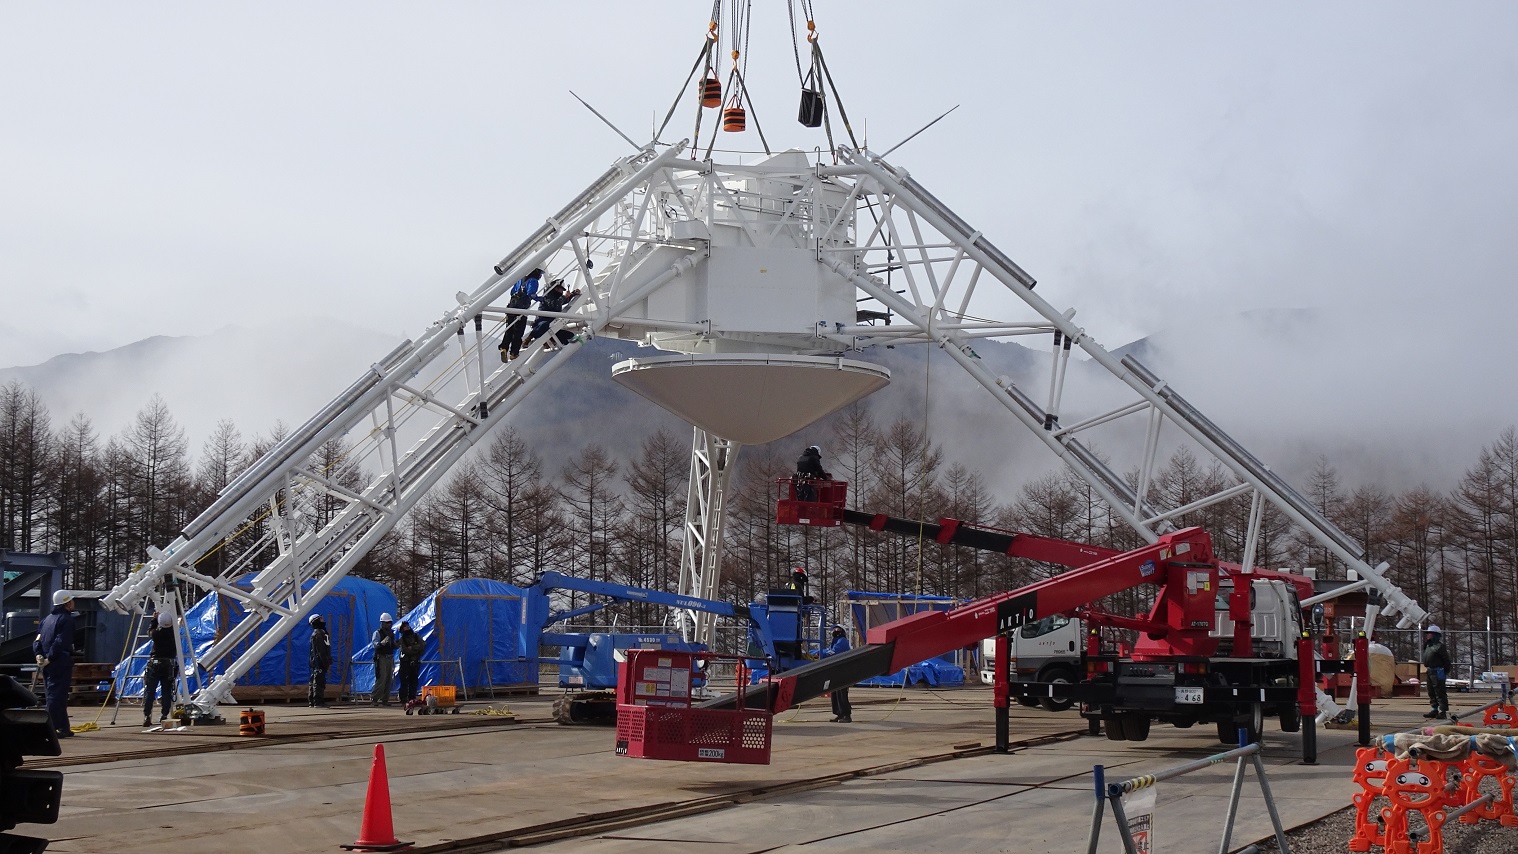
The sub reflector is being picked up.
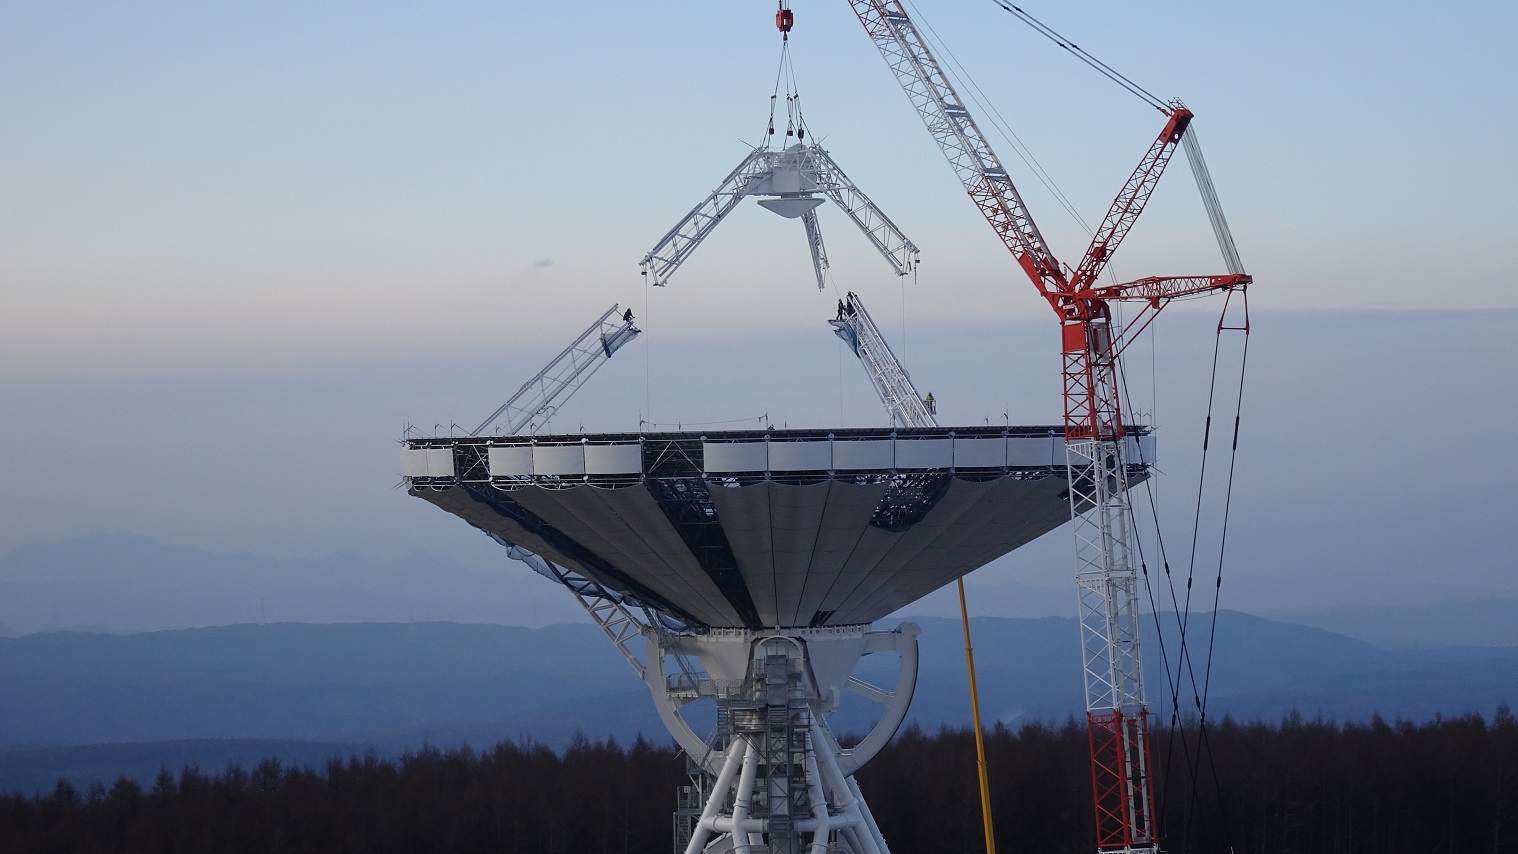
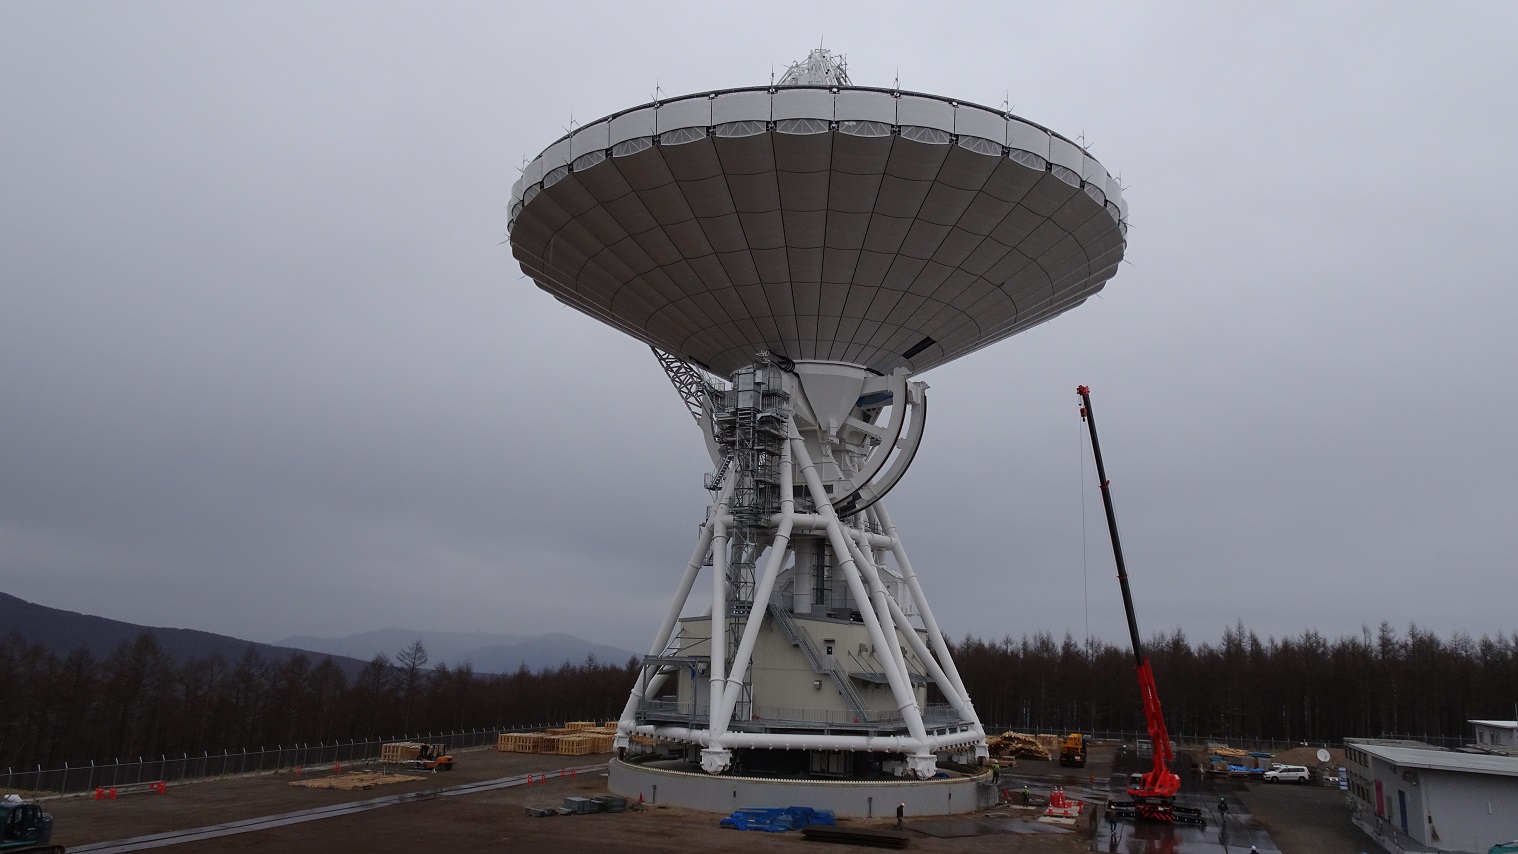
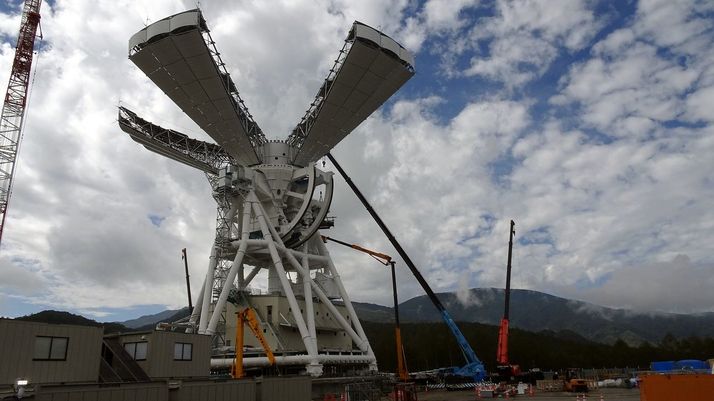
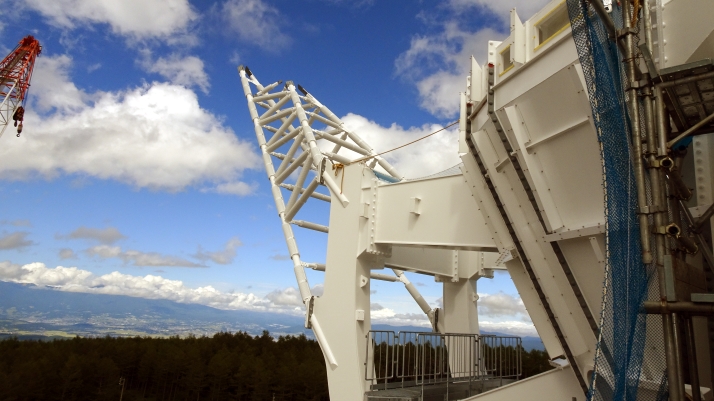
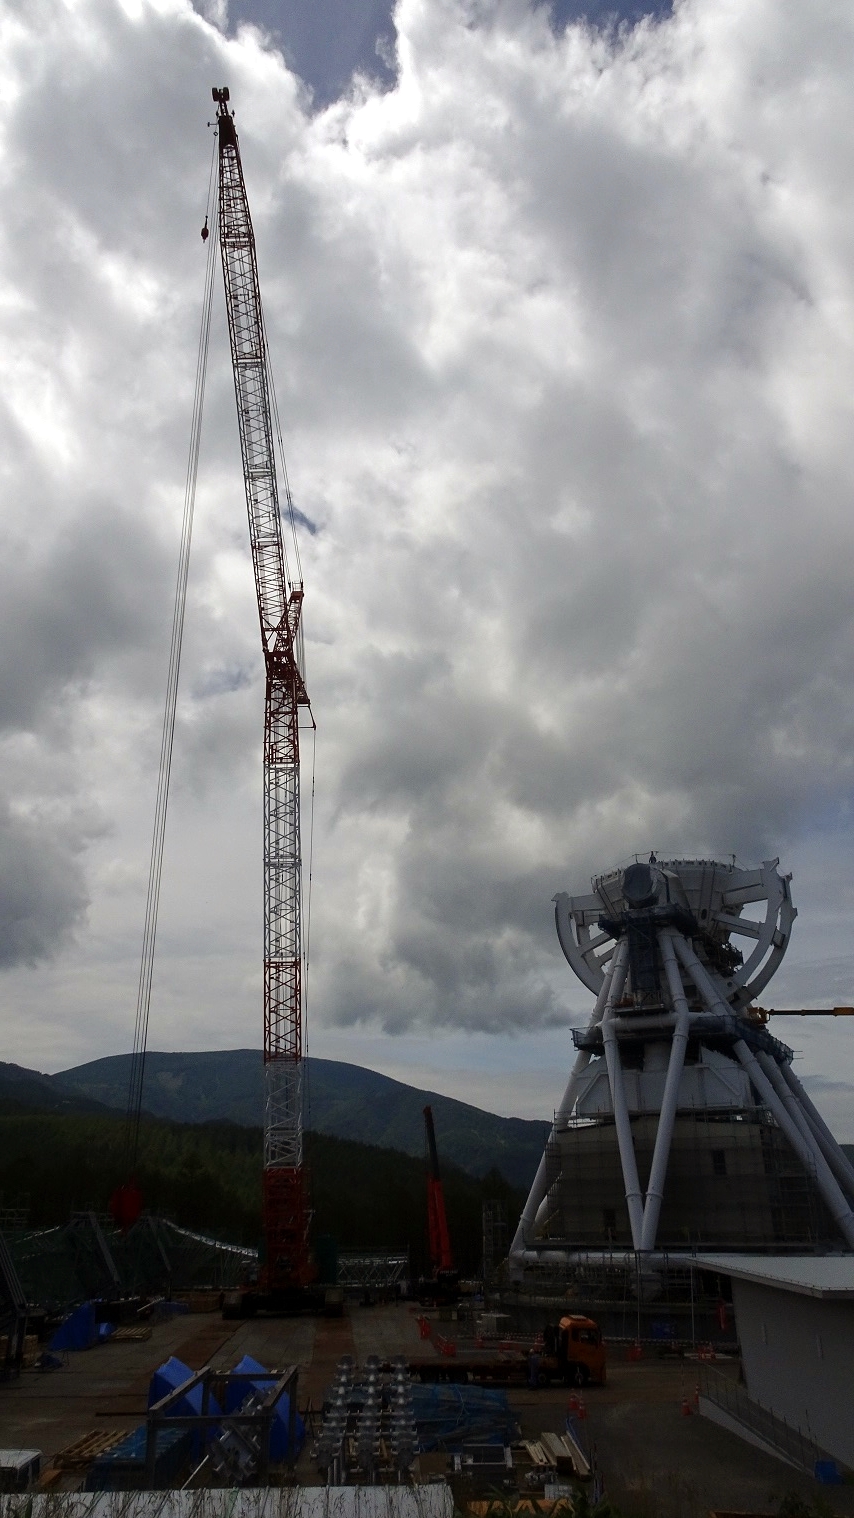
Installation of the sub reflector is complete. The height of the antenna is now 69m.
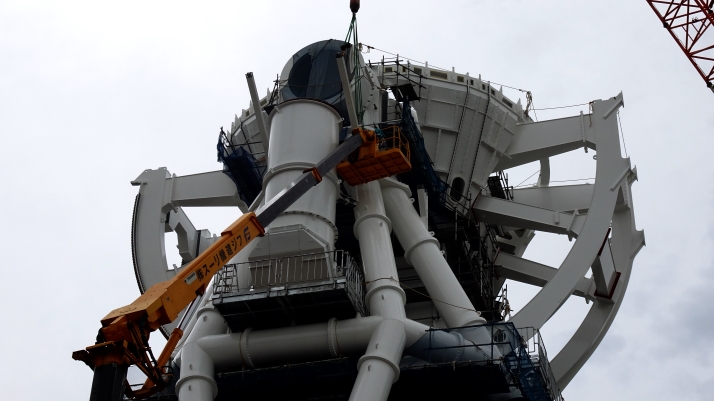
Attach a protective cover to prevent snow from entering the inside of the antenna.
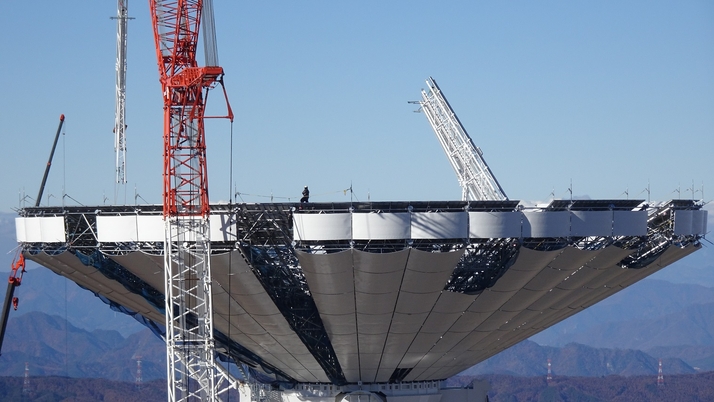
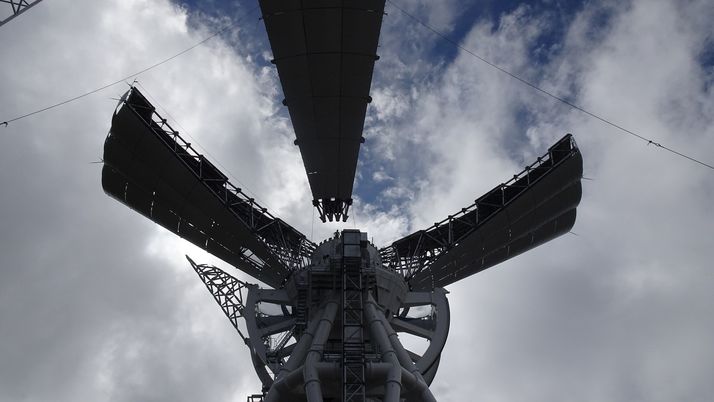
I just looked up at the sub reflector from the main reflector.
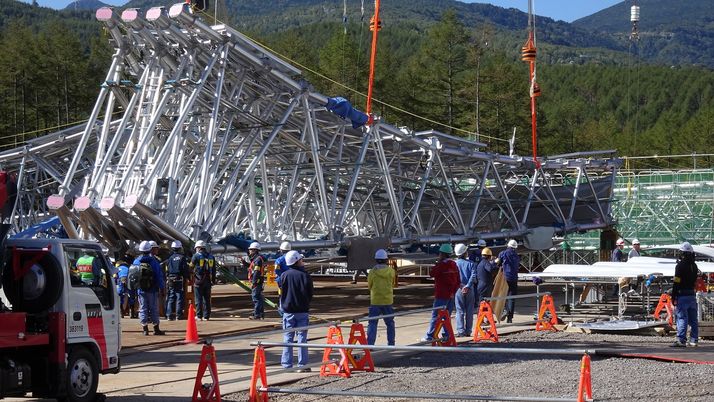
Antenna Assembly Construction (Main Reflector / Stay) #12
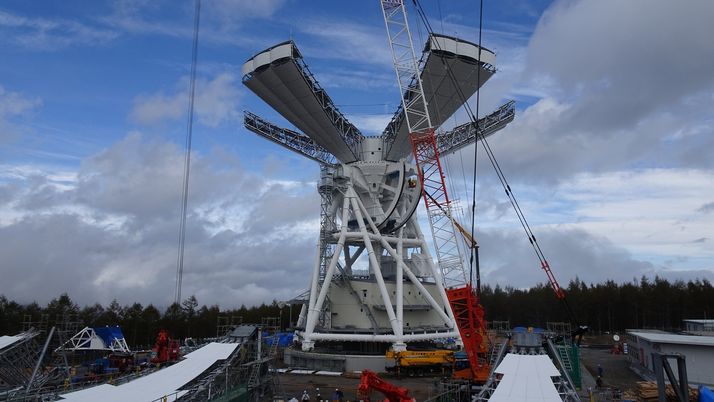
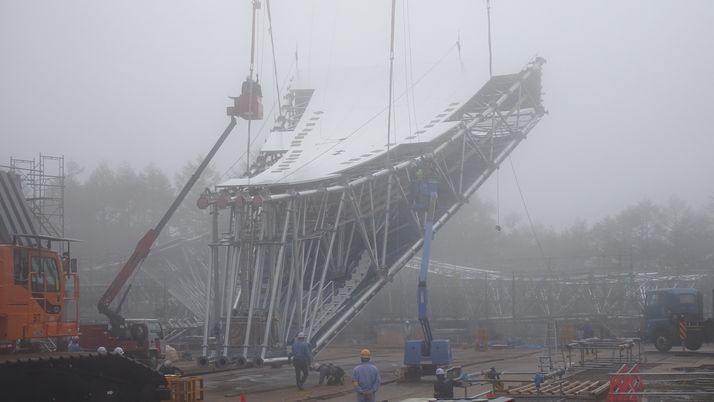
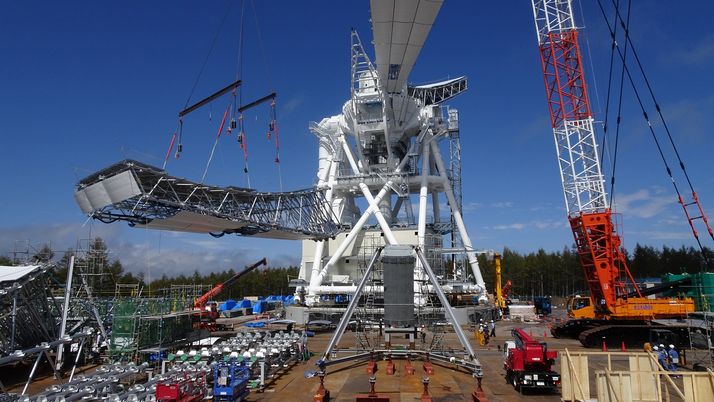
We started to install the stay (the part that is attached to the main reflector and supports the secondary reflector) from November 13.
Stay installed on November 13
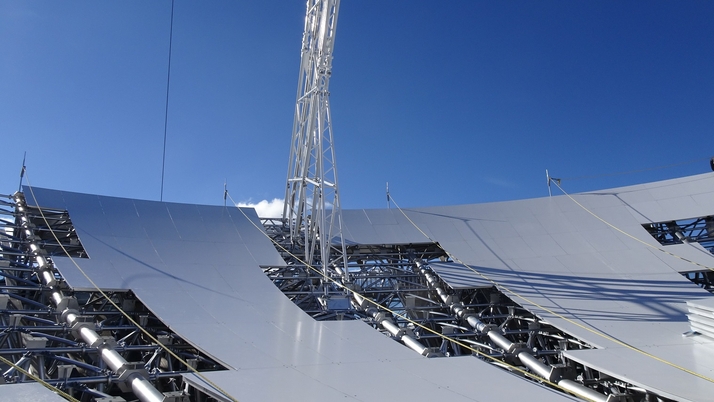
Stay installed on November 14
Lifting the stay installed on November 14

Installation status of the main reflector panel
The stay lifting on November 14 (taken from outside the site)
It's still big compared to people.
Antenna Assembly Construction (Main Reflector / Sub Reflector) #11
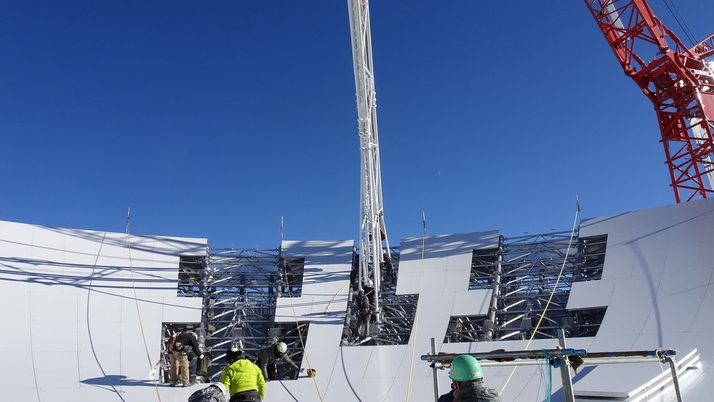
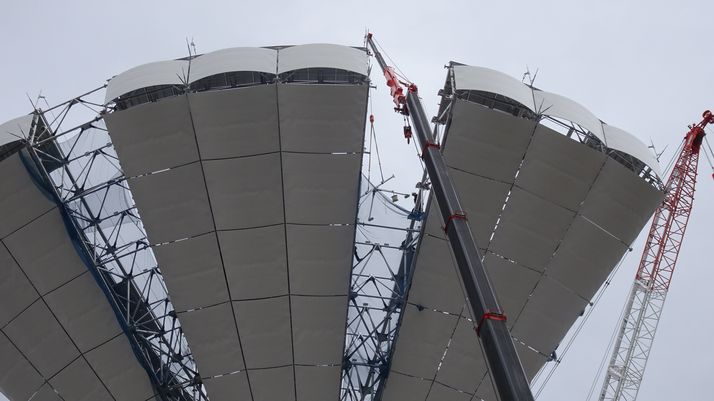
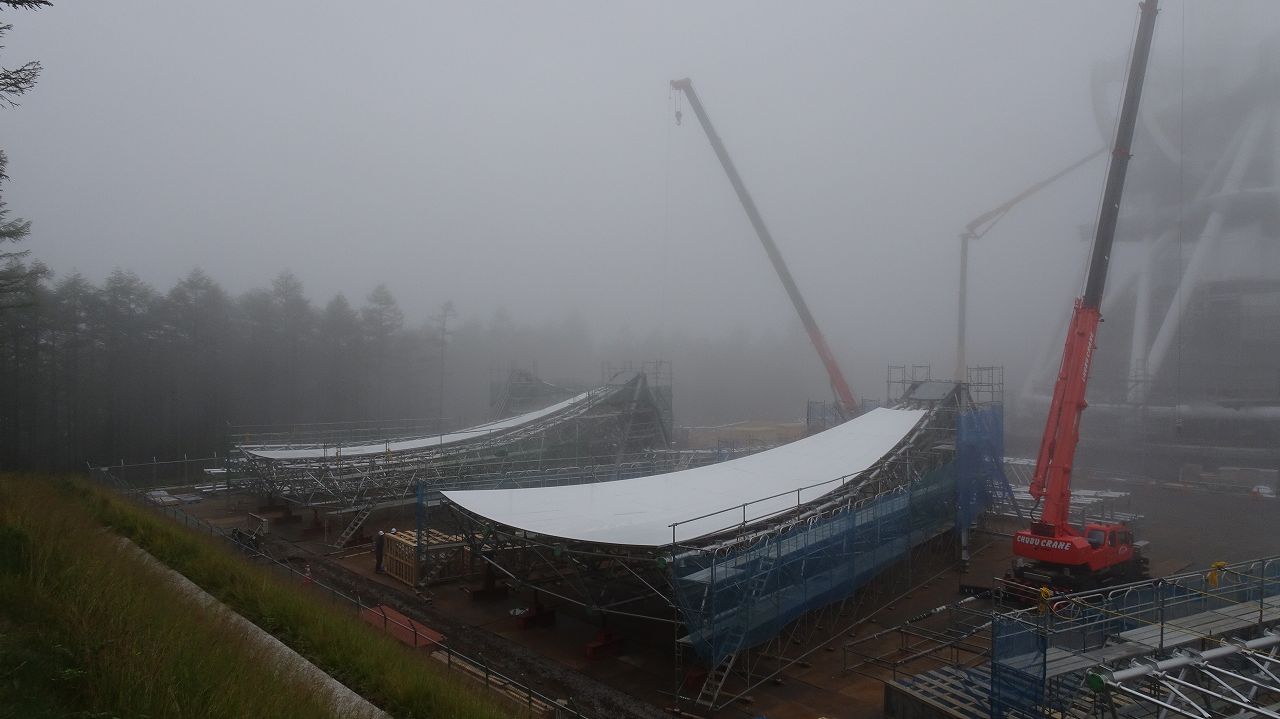
The main reflector blocks (block 7 and block 1) were installed on October 31 and November 2. The installation of the main reflector block is completed. From now on, we will start installing ribs and panels between blocks.
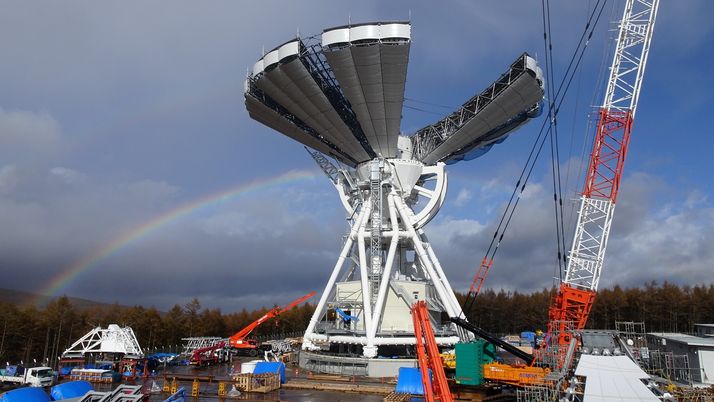
A rainbow appeared behind the antenna on October 27.
Installation of block 7 (October 31, 2018)
Installation of block 1 (November 2, 2018)
The sub-reflector groundwork (October 29, 2018)
This is the first mirror for reflecting the radio waves from the sub reflector into the focused beam feeding section. (November 1, 2018)
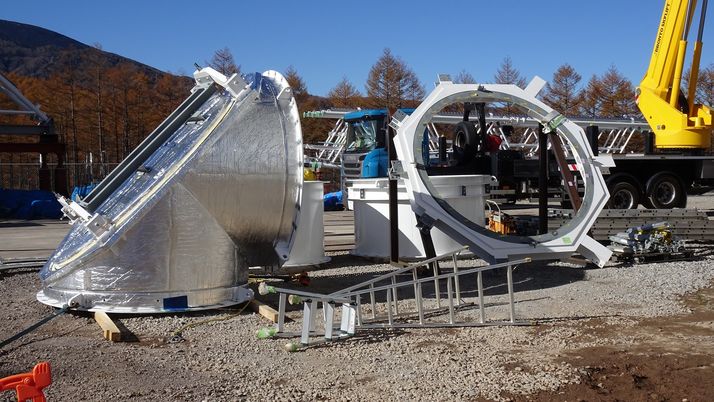
The first mirror groundwork (November 3, 2018)
Although there was a delay due to the bad weather etc. on the way, the lifting of the main reflector block was completed in about one and a half months.
Antenna Assembly Construction (Main Reflector / Sub Reflector) #10
The main reflector blocks (block 3 and block 2) were installed on October 16 and 22.
Installation of block 3
Installation of block 2. The work became more efficient each time, and it took about 6 hours at the first time, but now it takes about 3 hours.
The groundwork of the stay that supports the secondary reflector
The groundwork of the main reflector block 7 to be lifted next time
The groundwork of main reflector block 1 for final lifting. Can you find the difference between block 1 and block 7? The block 1 has places where the ribs are reinforced, becouse part of the stay can be attached to it. It is on the right side of the photo.
Installation of 8 blocks was completed on October 26, 2018. Next time, we are planning on October 29 and October 31, but it may change depending on the weather.
Antenna Assembly Construction (Main Reflector) #9
The main reflector block (block 9) was installed on October 13.


The groundwork of the sub reflector is also going well.
Installation of 8 blocks was completed on October 26, 2018. Next time, we are planning on October 29 and October 31, but it may change depending on the weather.
Antenna Assembly Construction (Main Reflector) #8
The main reflector blocks (block 4 and block 5) were installed on September 25 and October 11.
The photo below shows the appearance of the antenna with the block 4 attached. (September 25)
Lifting of block 5 on October 11. Although it was the first installation with the left and right sandwiched, it was completed without any problems.
The gap between the blocks is left open to avoid contact when lifting. As shown in the picture below, we will attach ribs and panels that connect the blocks later.
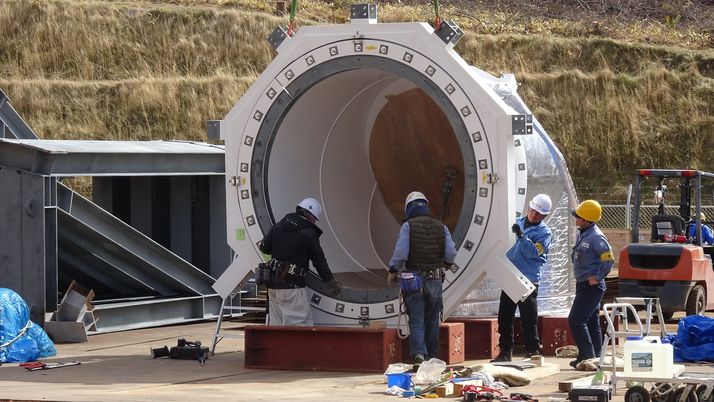
On the other hand, the groundwork of the sub reflector has already started. The hexagonal prism in the center is the sub reflector drive unit, and a part of the stay is attached to it. The sub reflector is supported by three stays.
This is a side view of the secondary reflector drive unit. It is mounted directly below this drive.
Installation of 5 blocks was completed on October 12, 2018.
Antenna Assembly Construction (Main Reflector) #7
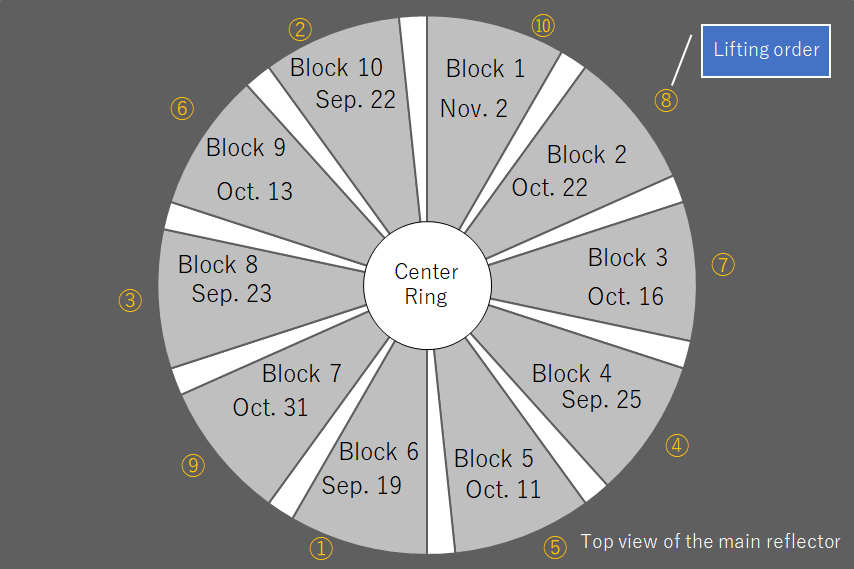
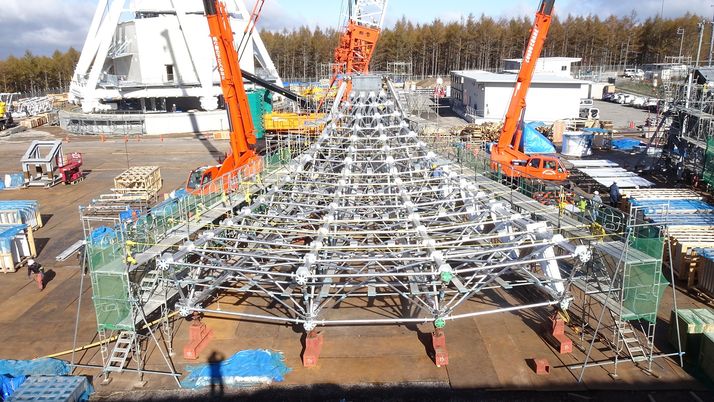
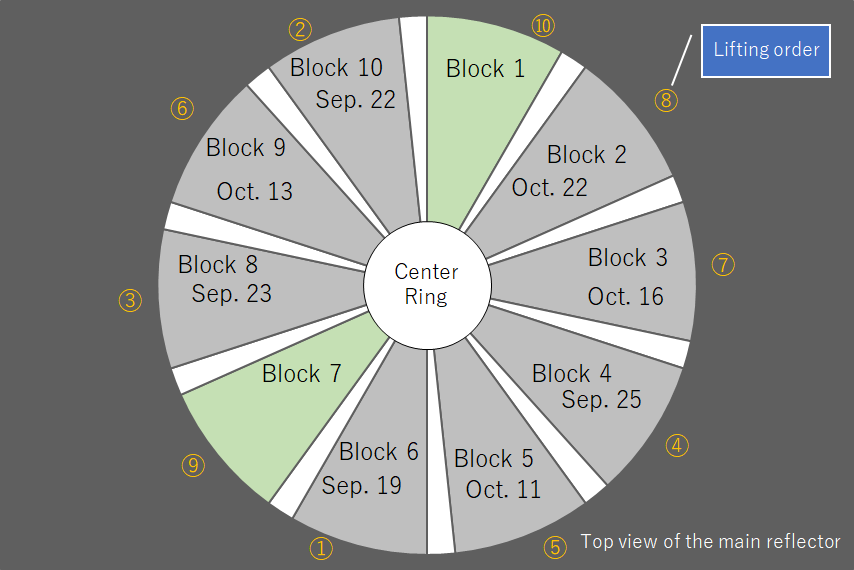
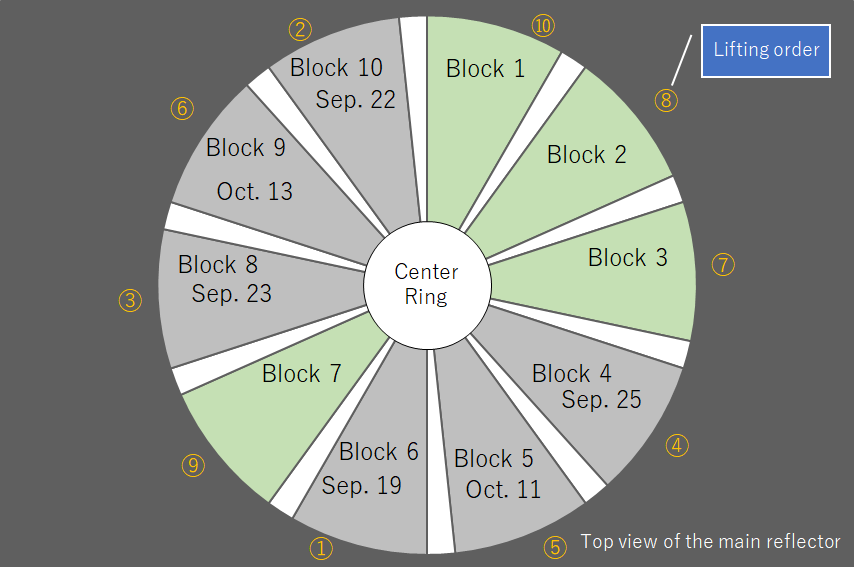
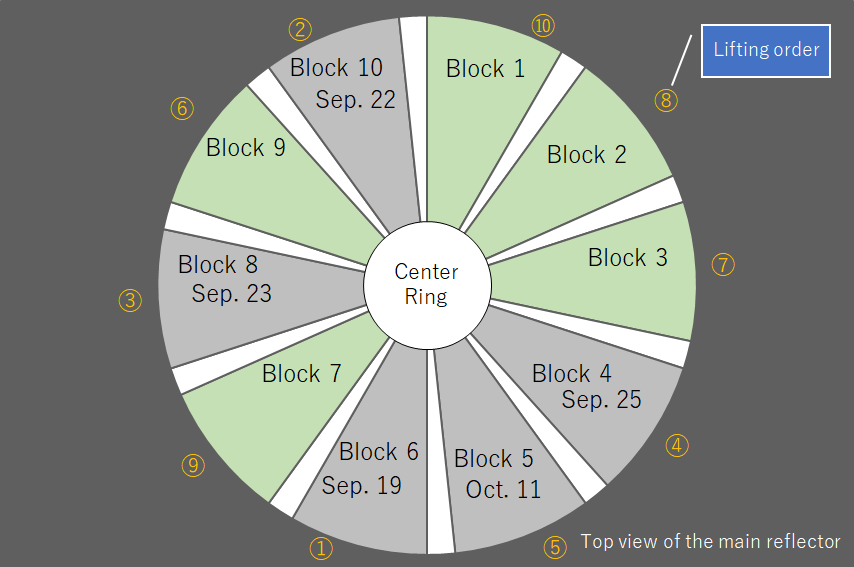
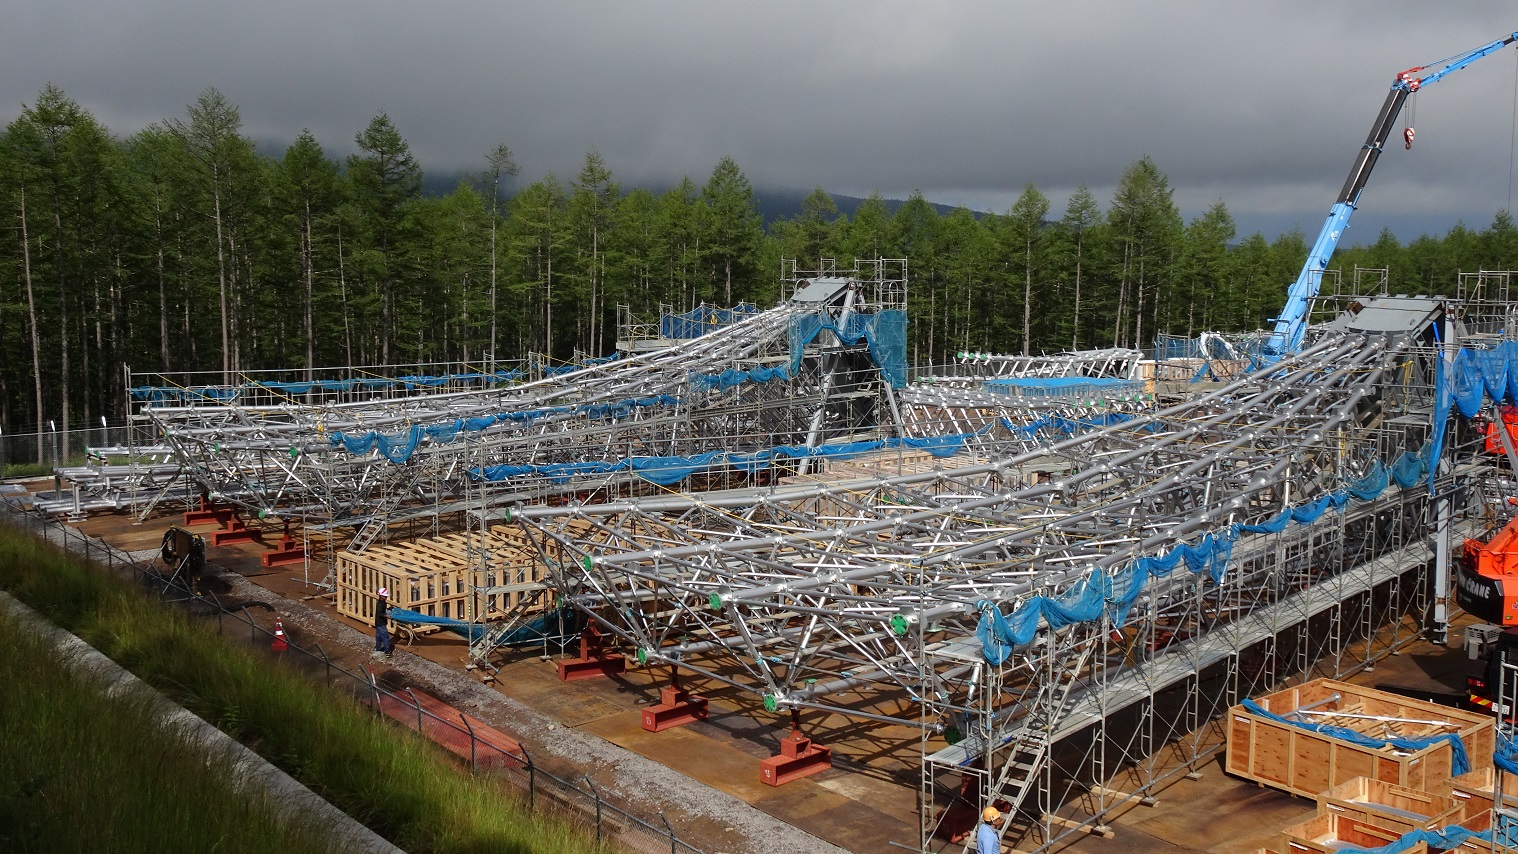
Two main reflector blocks (block 10 and block 8) were installed on September 22 and 23. The order of lifting (current plan) that received the most inquiries on Facebook is shown below. Since the main reflectors are grounded in 5 places, the lifting will be closed for a while after the lifting is continuous.
The figure below shows the block configuration when the main reflector is viewed from above. In the center is the center ring (a cylinder with a diameter of 8 m and a height of 5 m) to which the main reflector is attached, and the numbers from blocks 1 to 10 are assigned clockwise.
The order of lifting is indicated by orange numbers on the outside of the circle, but as of today, the gray parts ① to ③ have been completed. The order of lifting is indicated by orange numbers on the outside of the circle. As of today, the gray areas ① to ③ have been completed. Next time, we plan to lift block 4 (④). The white fan-shaped parts between the blocks are thinned out so that they do not touch each other when lifted, and will be installed later.
The block 10 lifted on September 22 is tilted 30 degrees with a sunshade panel attached.
The block 10 is fixed to the center ring.
The block 8 was lifted on September 23.
Move to attach block 8 to the center ring
Attached to the center ring
This is a panoramic view of the antenna with blocks 6, 10 and 8 attached.
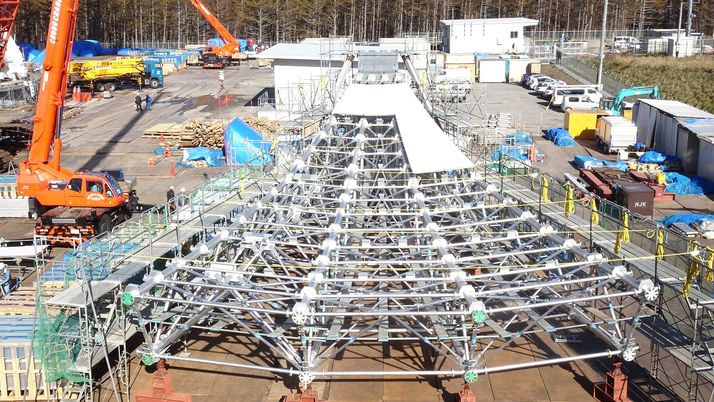
Antenna Assembly Construction (Main Reflector) #6
The main reflector is divided into 10 blocks and assembled. One block is a circle divided into 10 parts, and each block weighs 24 tons. The total length is 23m. Until now, it took time to establish the procedure and the weather conditions were not set, so it was a little late, but finally we were able to install the first block. The photo below shows the grounded main reflector being lifted, brought into place, and a sunshade panel attached to the back.
After installing the sunshade panel, tilt it slightly to attach it to the center ring.
It looks like a panel aerial swimming.
It is attached to the center ring (cylindrical shape with a diameter of 8 m and a height of 5 m).
It is attached to the center ring.
It is a panoramic view of the antenna after installation. We will install it one by one from now on.
Antenna Assembly Construction (Main Reflector) #5
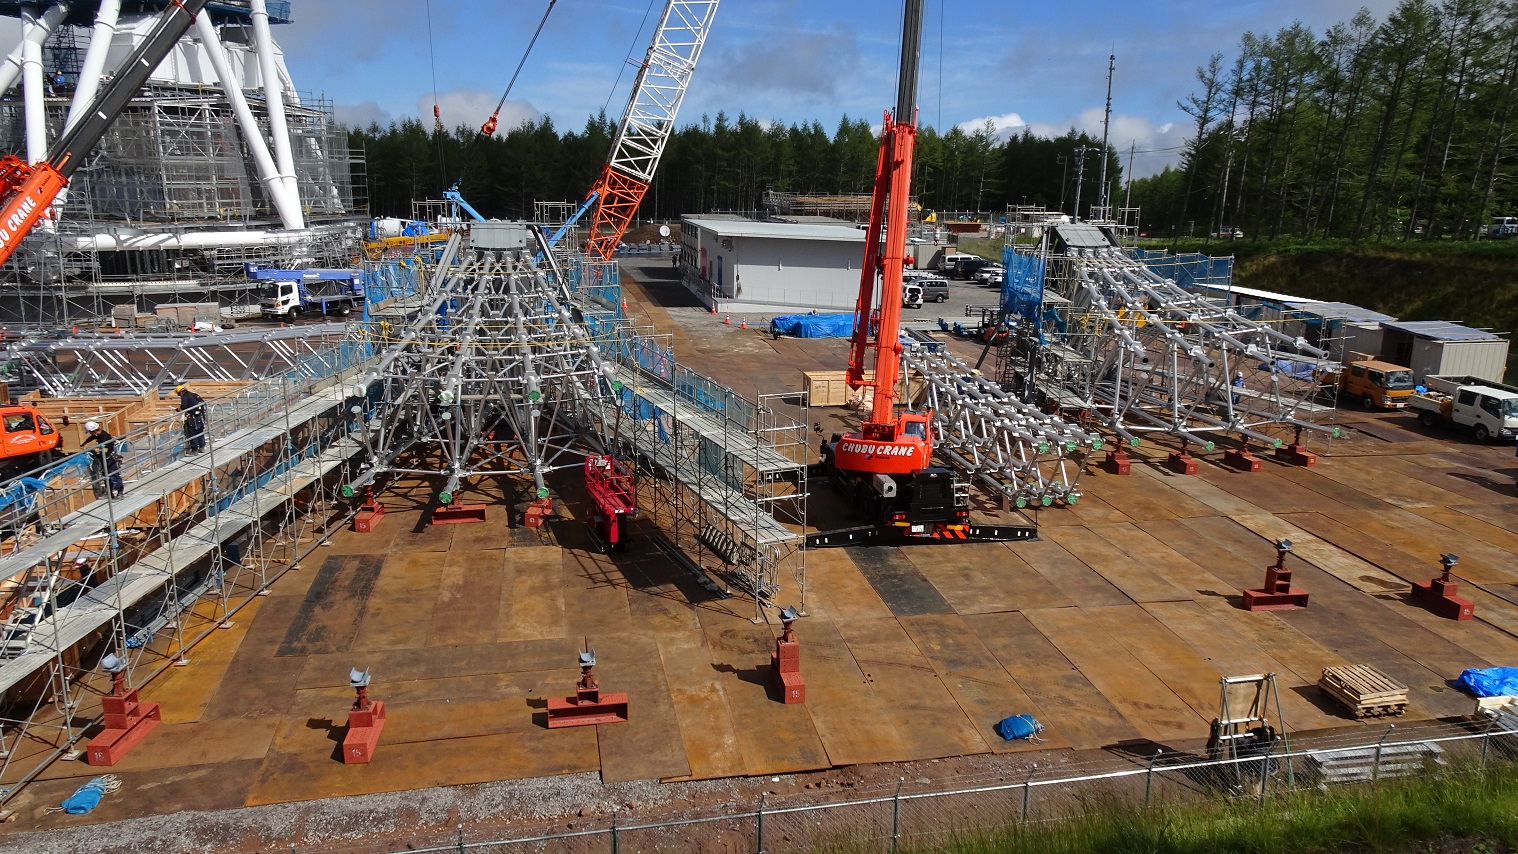
The center ring of the main reflector, shield tube and support truss were installed. The photo below shows the parts of the center ring (diameter 8m, height 5m). The main reflector is attached to it.
This is a view of the center ring parts from the outside.
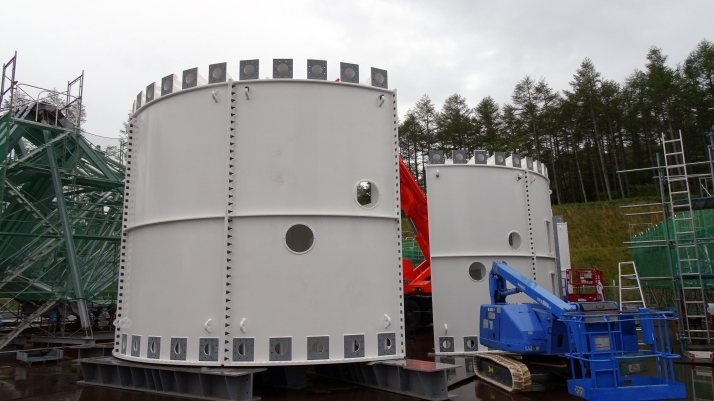
You can see the size by comparing the center ring and the worker.
The installation of the center ring has just started.
The 4th mirror, shield tube, and 5th mirror are attached to draw the beam focused by the primary and secondary mirrors reflected by the third mirror into the beam switching chamber.
It is an enlarged photo near the 4th mirror. The vertically descending part on the left of the center is the shield tube.
It is the overall appearance after installing the center ring and shield tube.
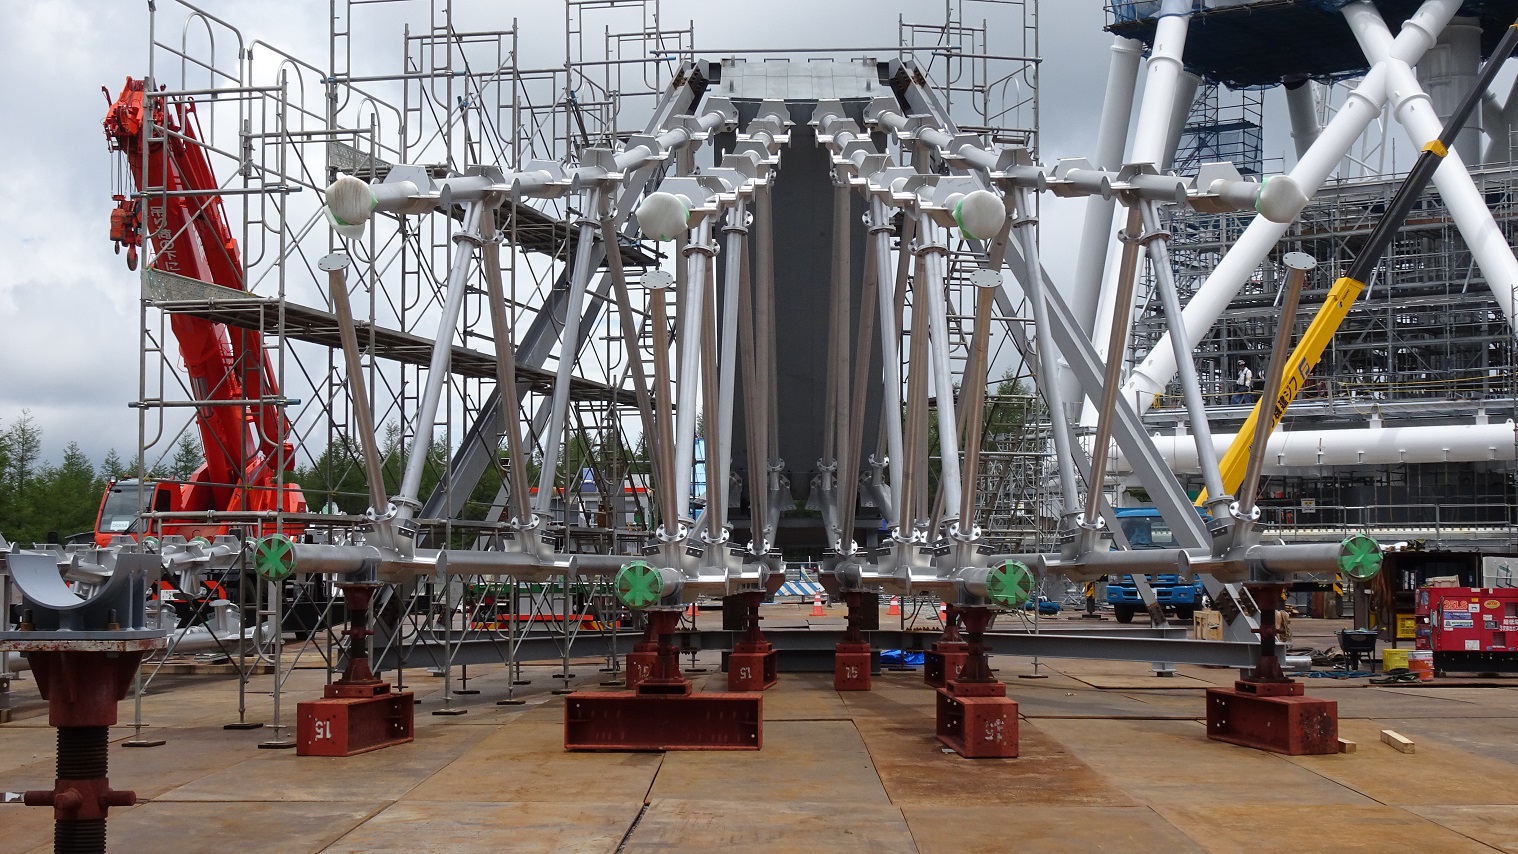
It is a support truss that assists the main reflector. It looks like the horn of Unicorn Gundam.
Support truss seen from the 5th floor (near the EL shaft).
Antenna Assembly Construction (Main Reflector) #4
The groundwork of the main reflector is being continued. After the mirror panel has been installed, the sunshade panel has been installed (three curved panels below the photo).
The beam of a 500 ton crane was doubled to lift the main reflector panel. It will be 100m above the ground.
Antenna Assembly Construction (Main Reflector) #3
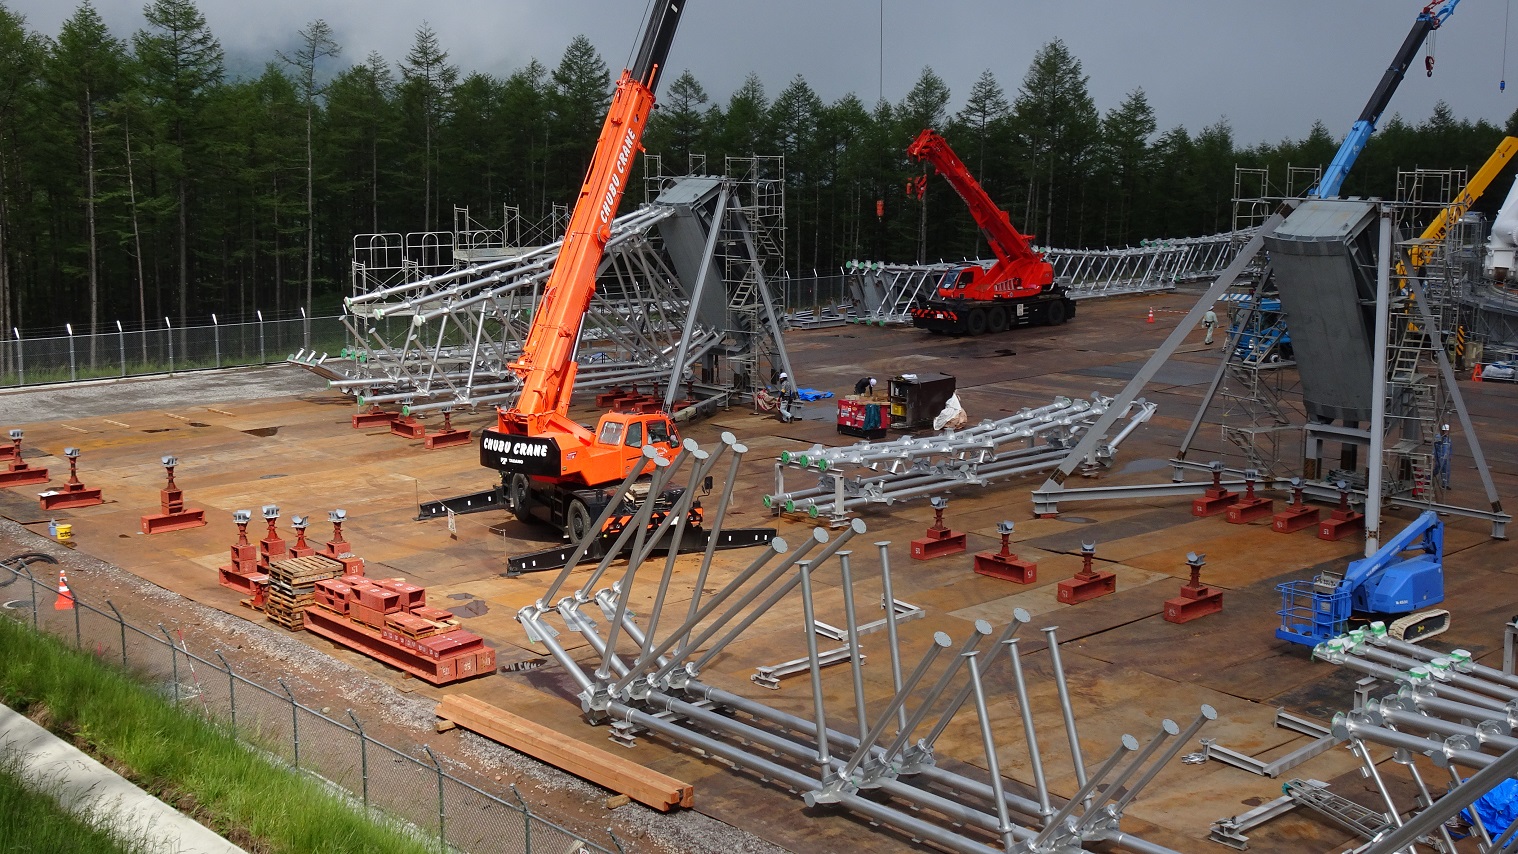
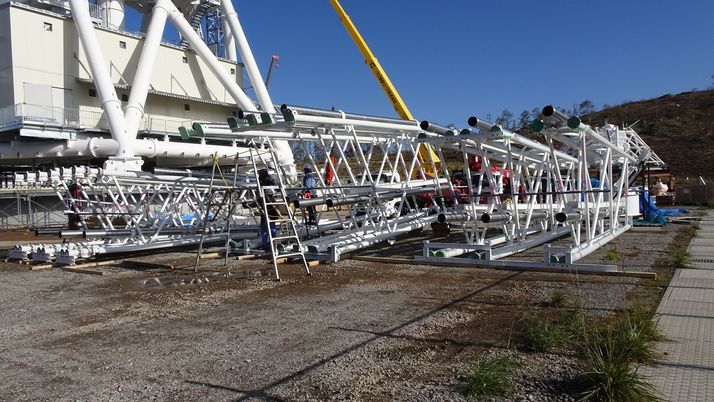
The work by enlarging the groundwork of the main reflector to 5 places is being continued. We are starting to install the panel from the one where the ribs have been assembled.
Start sticking the mirror panel and fix it to the ribs one by one with bolts. It is a variable type bolt because it is readjusted in the state where it is finally assembled to the antenna.
You can see a gap you can see in between the ribs and the bolt.
Pasting of the mirror panel of 2 blocks out of 10 blocks is completed.
Antenna Assembly Construction (Main Reflector) #2
It is in continue to work to expand the land set point of the main reflector unit. The length from the base of the jig, which is connected to the tip of the rib is located about 23m.
Antenna Assembly Construction (Main Reflector) #1
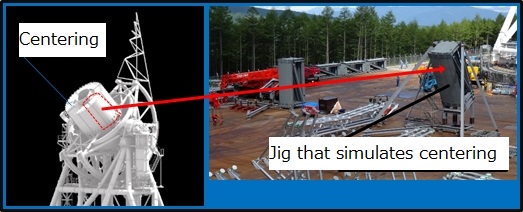
The groundwork of the main reflector has started. First, assemble the skeletons called the rib that supports the main reflector. The ribs are fixed to a cylindrical object with a diameter of 8 meters called the center ring. Adjust the mounting angle, etc. by attaching it to a jig that simulates the center ring in the ground.
The ribs are assembled at 5 locations, becouse there are 5 types of center ring jigs.